

Over 10,000 page views! Huzzah! Thanks for being awesome readers (and only a couple people I bribe).
Today's tutorial is short but really cool to make and you can knock out a bunch this week and enjoy them this weekend. Check it out.
Today's tutorial is short but really cool to make and you can knock out a bunch this week and enjoy them this weekend. Check it out.
Cool wine bottle tiki torches! We originally found the tutorial on Design Sponge (which if you have never been to, you should totally check it out). The tutorial is really great, so I recommend using it because it is slightly more detailed then ours, but if you want the gist of what it tells you to do, here it is.
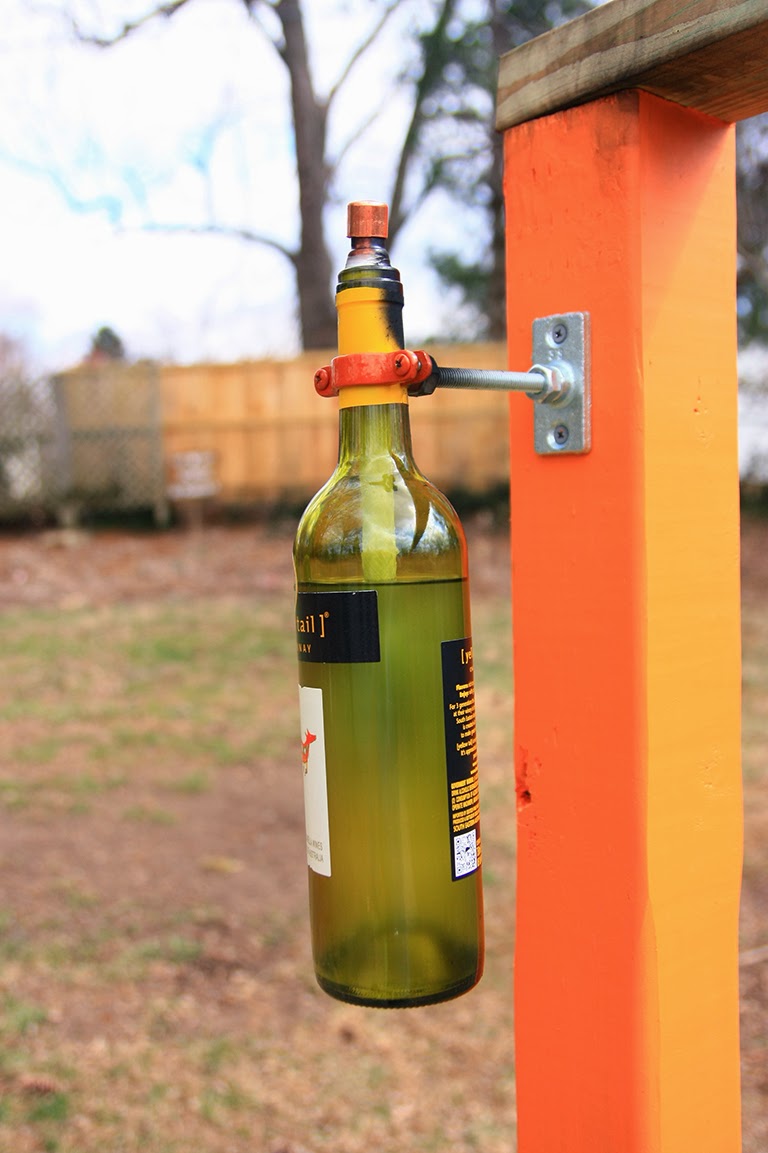
This is the mount for the wine bottle.

This is the mount for the wine bottle.
And these are the pieces that created it.

(Below is a much easier to read and copy/paste list of items you're looking for! The pictures were just fun)
For the bottle itself, these are the parts you'll need.

Your quick copy/paste purchase list looks a little something like this. It includes the break down on cost for us to make four at once with prices from Home Depot (just because that's the hardware store that's closest to us). Cost doesn't include your choice in fine wine:
For the bottle itself, these are the parts you'll need.
Your quick copy/paste purchase list looks a little something like this. It includes the break down on cost for us to make four at once with prices from Home Depot (just because that's the hardware store that's closest to us). Cost doesn't include your choice in fine wine:
1. Empty Wine Bottle (4 needed: $ one liver)
2. Teflon Tape 1/2” =$0 (already had)
3. Copper Top Plate Connector (threaded for 3/8”-16 thread rod)= $1.94 each
4. 1” Split Ring Hanger (threaded for 3/8”-16 thread rod)= $1.68
5. 1/2” x 3/8” Copper Coupling=$1.50 each
6. 1/2” Copper Cap=$0.68 each
7. Two Hex Nuts (threaded for 3/8”-16 thread rod)= $2.70 for 25 pc.
8. Two #10 x 1” Zinc Plated Wood Screws (if your mounting it to wood)= $0 (already had)
9. 3/8”-16 Zinc Plated Threaded Rod (I bought a 3’ rod and cut it down to 8, 4-1/2” with a dremel or cut off tool.)= $1.97 per rod
10. Tiki Replacement Wick= $2.96 for 2
11. Torch Fuel (For safety reasons, only use fuel made specifically for outdoor torches. i.e. Tiki brand)=$0 (already had. Ended up buying more, though. A larger container is about $10-$13. This cost is also not included in the final cost)
=$33.79 for four
Once we had purchased all of our pieces, we came home and put them together. This took all of about 3 minutes.

For the bottles, make sure they are dry and clean on the inside. Take the copper coupling and wrap the fat side with enough tephlon tape so it doesn't fall into the bottle neck. Then just fill the bottle with your tiki torch oil and place the wick inside the coupling, placing the coupling and wick on/in the bottle last.
I would recommend mounting the mount itself first to wherever you are going to put these. Then take the wick and coupling out of the bottle and mount the bottle to the split ring hanger, THEN put the coupling and wick back in the bottle. This will keep things from getting shifted around or the wick from falling into the wine bottle.
Let the wick soak up some of the tiki fuel and then light. Make sure to not have any on your hands because I am not responsible for the loss of fingerprints or, ya know, hands...
They are really cool and they are great to have around our fire pit because they help light up the area just a little more. The tiki torch fuel also has citronella in it, so it keeps the bugs at bay while we roast our marshmallows. You can see the lamps we made in the picture I put up last week, mounted to the hammock supports.


Hopefully this tutorial combined with the other much better one will help you knock these out. Scott wants to replace the wine bottles with bourbon bottles because he thinks it's classier. I'm not completely sure about that, but they do lend themselves to many different types of bottles, so you can switch them out anytime you want.
One more time.

Hopefully you'll be able to make some of these and enjoy them this week. We hope everyone had a fun Easter! He has Risen, yo!
I would recommend mounting the mount itself first to wherever you are going to put these. Then take the wick and coupling out of the bottle and mount the bottle to the split ring hanger, THEN put the coupling and wick back in the bottle. This will keep things from getting shifted around or the wick from falling into the wine bottle.
Let the wick soak up some of the tiki fuel and then light. Make sure to not have any on your hands because I am not responsible for the loss of fingerprints or, ya know, hands...
They are really cool and they are great to have around our fire pit because they help light up the area just a little more. The tiki torch fuel also has citronella in it, so it keeps the bugs at bay while we roast our marshmallows. You can see the lamps we made in the picture I put up last week, mounted to the hammock supports.
Yeah, there is one missing here. Oops!
Hopefully this tutorial combined with the other much better one will help you knock these out. Scott wants to replace the wine bottles with bourbon bottles because he thinks it's classier. I'm not completely sure about that, but they do lend themselves to many different types of bottles, so you can switch them out anytime you want.
One more time.
Hopefully you'll be able to make some of these and enjoy them this week. We hope everyone had a fun Easter! He has Risen, yo!
This comment has been removed by the author.
ReplyDeleteCongrats!
ReplyDelete