Showing posts with label blinds. Show all posts

Thursday, February 27, 2014

Lack of Communication

I have recently started a board on my Pinterest that is completely dedicated to the blog here that you can follow for all of the recent posts. While I was going through and pinning all of the old blog posts one by one, I realized that I left my readers at a bit of an open-ended post about our living room. The last thing you guys saw was this picture.


This was supposed to be followed up by the final picture of our living room, completely painted and ready to go. Unfortunately, it took a while for us to get up to that corner of the room because it involved a ladder which we did not have at the time.

Realizing that this has happened, allow me to convey my deepest apologies.


To right that wrong, allow me to introduce, the finished living room wall!


You might recognize the deer head from this post a couple of months ago. (And yes, in case you were wondering, my eyes do often wander over to the stag head. He's still so cute!) Now he has some friends! 


Along with the fact that our TV viewing is now way more comfortable than it was with the tan wall behind it, the nice contrast that the other white objects have on the wall really balance out the dark TV and media center. My little white whale even makes it into the mix somewhere so that he is usually silhouetted by the dark blue. And remember, this wall color cost less than $5 because it was in the 'oops bin' at Home Depot!


Filling the frames are just large scale images I found online (under the creative commons rule) that I had printed at Staples for around $2 (it was a while ago, so I don't remember the specific cost, but it was absolutely less than $5). I decided to try out the rumor on Pinterest about being able to get engineering prints and it was totally true! Worth it! They are black and white originally, so that helped, but the line quality is amazing. The paper is a little thin, but once it's behind a frame, you can't tell anyway. The frames, of course, were just refurbished Goodwill frames. You know I don't buy new! All of this framed art cost less than $15. Score.

You also may have noticed that the furniture has been rearranged a little. I decided to move Scott's leather chair and my over-sized chair together so that they could keep each other company on the other side of the room. The table they share was $10 at the ReStore.


(After I moved them, I realized how much this configuration reminds me of my Grandma and Grandpa O's House (except for the massive ceiling to floor bookshelves behind their chairs)!)

We really like how open the room feels with them over there. We moved the couch and end table right up against the wall on the other side and we might be getting a couch from Beth and David (who are replacing it with an amazing grown-up sectional from Macys), that will go on the opposite wall. We will have PLENTY of seating, which is something in short supply in a household where we frequently have from 5-12 people trying to watch a movie at one time. Remember, we don't even have kids yet!

All in all, I know the changes you've "missed" haven't been huge, but they have made a big impact on how we use the space. We recently acquired a Kinect from a generous Uncle and now are able to simply move the coffee table to get our Xbox skiing and bowling on. It's amazing how much just moving a couple of things around can really help the flow of a room.

Monday, February 24, 2014

Finally Hung Out to Dry

One of the many ongoing projects around here has been the Little Laundry Room that Could.  When we moved in, it was not a very welcoming space for doing an unpleasant task.


I was able to paint the walls (which I talked about in it's first appearance on this blog), but there were still a couple of other little things that I felt it needed to be considered 'done'.

I started with a cute sign.


These are just some letters I picked up from Hobby Lobby on sale %50 off. A couple of layers of yellow spray paint and they were really popping. Scott hung them up on the wall and I was on to the next task.

Also while I was at Hobby Lobby, I picked up two sheets of yellow duck tape. I took my hole punch (that you might remember from the shell light) and cut out a bunch of circles.


They helped turn this


Into this


I also used a 3/4 yard of fabric I used my 40% off mobile coupon for and made some cute curtains. These were just hemmed and held up by some clips on the back. The fabric was $3 b/c of the coupon and I had the hooks from another project that I didn't use them for.


Some laundry themed art was added to some Goodwill frames that I made over the same way as these. They were then added to the other wall.


I even put a little bird collage that I had made in the old apartment and hung it on the little handle to get to the fuse box just for added color. It just comes right off for accessibility, though.


I bought some baskets from Michaels for 50% off and they now hold all of our non-reusable dinnerware for entertaining.


Last but not least, I grabbed a giant canvas and made a PLAY DIRTY sign (har har! Get it? CAUSE IT'S A LAUNDRY ROOM!), and suspended it from the ceiling. I did this because something sitting on the ground would be both in the way and a fire hazard. This way, it only blocked the ugliness from the view that people would be looking from most (the kitchen). This is before.


And here is the after


We made sure to leave plenty of room between it and the water heater.


And that's it! The only other two things that we might touch on in here are:

-Replacing the door on the right (that goes to the backyard) with one that has a window for added light and openness. We've been mostly looking at the Restore to see if we get lucky, but nothing so far.

-Putting in some sort of new flooring. This probably won't happen for a long while, though, so covering the checkered patters with rugs works. It also keeps us off of the really cold floor that the room has, at least during the winter.


I'm so happy that it's done! I really don't mind people seeing my laundry room now, which is a big step up from when we moved in. What do you think, is redoing a laundry room worth the time and effort? Let me know in the comments!

Monday, February 17, 2014

No Longer Mark Rothko's Bedroom

Scott and I have painted a lot of the rooms in our house, but had managed not to touch our own bedroom. We both knew that the oddly skin-colored walls were not what we wanted, but it took some hue searching to really find something that fit both us and the colors of the house so far.

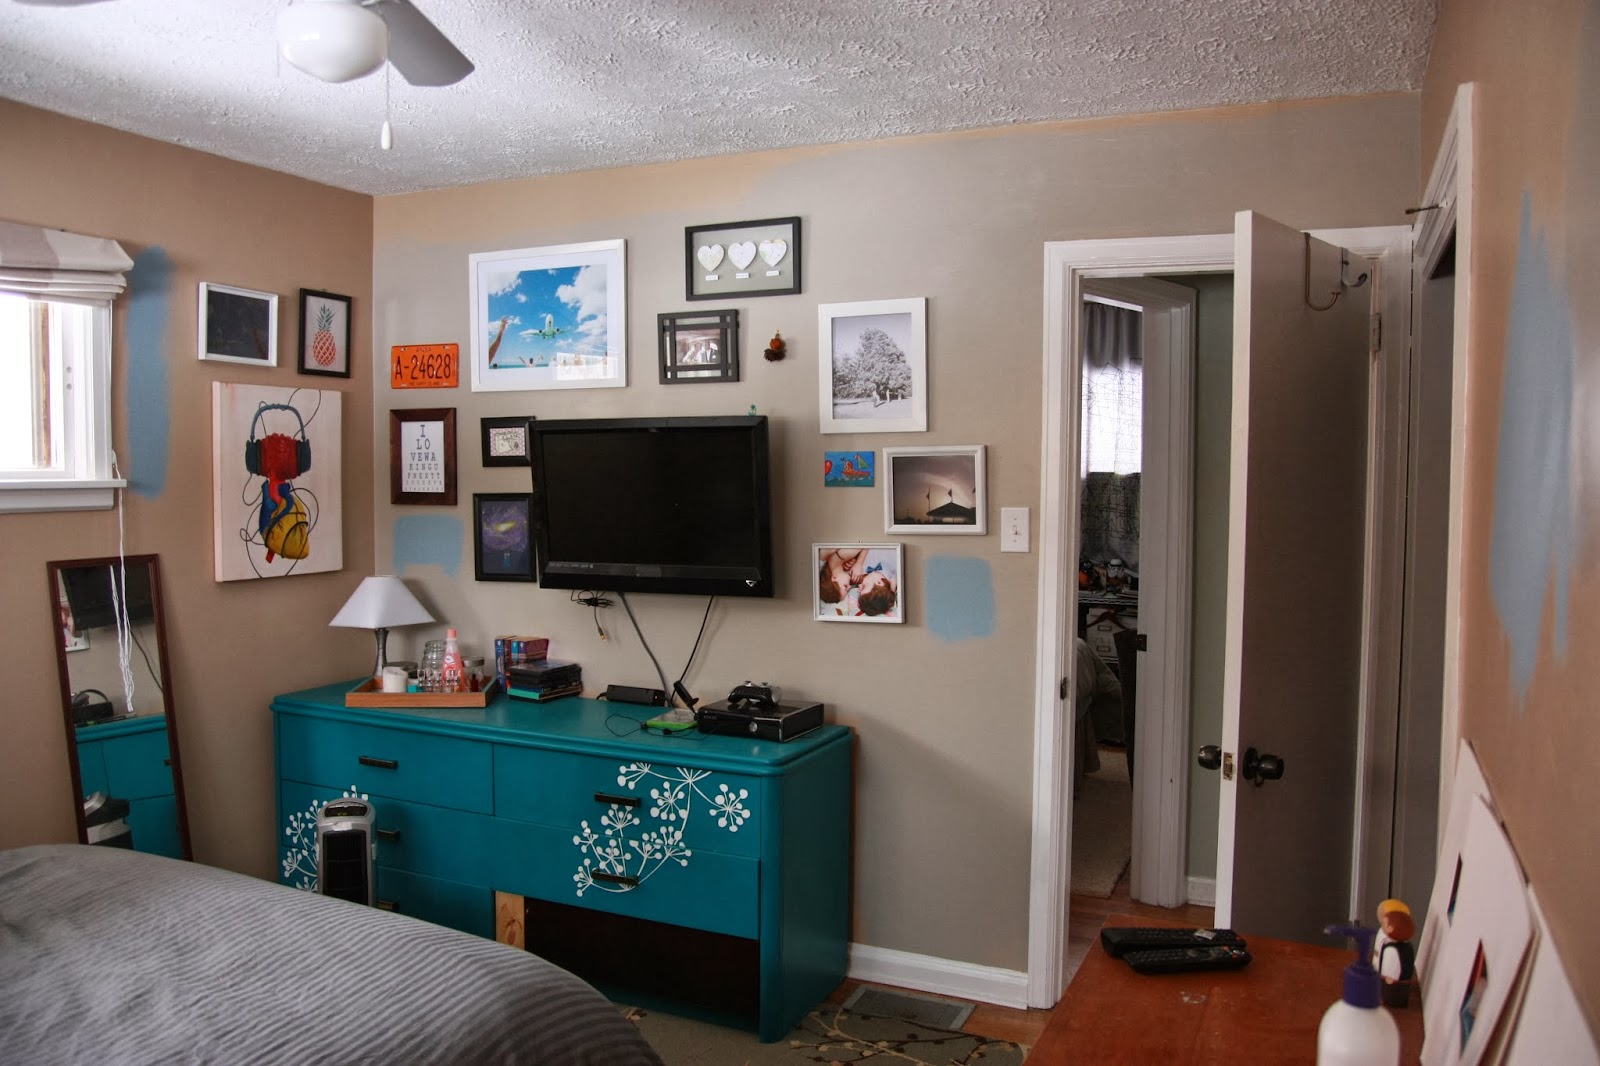
Over the past couple of months, I've bought three or four difference wall color sample pots and tried them on various walls in our room. As of yesterday, we had different splotches of color everywhere. It really kept the room from being the relaxing retreat that the bedroom should be. For example, on the tv/photo wall, all of the sample areas have been marked in red.


I was getting a little desperate, lol.

The entire space just really felt lack luster. Due to the different light sources (hallway, bathroom, lamp, and window), we needed a color that looked great in all of them. We also really wanted to feel lightness during the day, but a cozier color transition at night. The current color just wasn't doing that for us.


So in my search, I started looking for pictures of rooms that really made us feel bright, yet cozy. I showed Scott this pictures from Pinterest and we were both sold.


Beth whipped out her Handy Dandy Giant Color Swatch Catalog and we were able to match it up with a color affectionately called "9075" (if I remember correctly).

The entire painting process only took a couple of hours because I was cutting in while Scott was on roller duty. We did one wall at a time because the room is small and doesn't have a lot of furniture moving space, but it really went quite smoothly. I began the entire process by taking this picture.


This was so I could use it for reference to remember how all of the frames were arranged on the wall after we had finished painting.

Then I started around the closet and bathroom doors to give Scott a nice pre-painted frame to roll inside of behind me. When I 'cut in', or 'edge', I like to use this brush. It is small, has a rubber handle (for long term comfort), and really gets the job done. If at all possible, I really try to avoid using blue painters tape for straight forward room painting (which I realize hasn't really happened that often in our house). For anyone scared of free handing around their molding, it just takes a little practice and some patience before it becomes second nature.


Before we knew it, we already had one wall done into the next corner. It was drying pretty quickly and we were really loving the result.


We were glad that the paint was drying darker than it applied, too. It went on a little light for our taste, but the worry was quickly set aside when we were able to see large sections completed.


Notice, above the window in on the right side of the picture above is ready to be painted. When Mom and Dad stayed with us last time, Mom brought us the awesome roman shades that she made (that actually work, unlike mine) and installed them. Since we didn't want to risk getting any paint on them, we cut down the sides of a large trash bag and taped it so that it worked as a kind of tarp over the blind. This worked really well and gave us the piece of mind to get done much quicker than we would have otherwise.


When the room was completely painted, we were super pleased with the result.


It feels very bright and grown up, but doesn't feel cold or distracting at night when you want to feel relaxed.


Because the wall color was so close to the color of the large rug we had in the room before, we switched around some of the rugs in the house and ended up with a slightly smaller (but fuzzier) one perpendicular at the foot of the bed. It's nice between the toes!

Another reason it took so long to find the right color for our room was because I was afraid of walking out of our newly painted bathroom into a dark cave. Before, it was kind of like this.


But now, it really reminds us of our honeymoon in Key West! A nice ocean blue room from the tropical green bath.

I don't know why the color is wonky here, sorry

We're so excited our bedroom doesn't look like a Rothko painting anymore! It's nice to be able to retire to a place that looks much more finished, especially when the rest of the house is really coming along.

Have you ever painted a room and it changed the entire mood of a space? Let me know in the comments!

Thursday, February 13, 2014

Bliiiinded by the Light

Don't act like this isn't the first thing that came into your mind.


Manfred Mann - Blinded by the Light


So earlier I promised to walk you through my curtain creating for the master bathroom which I had almost finished. We begin with the window.


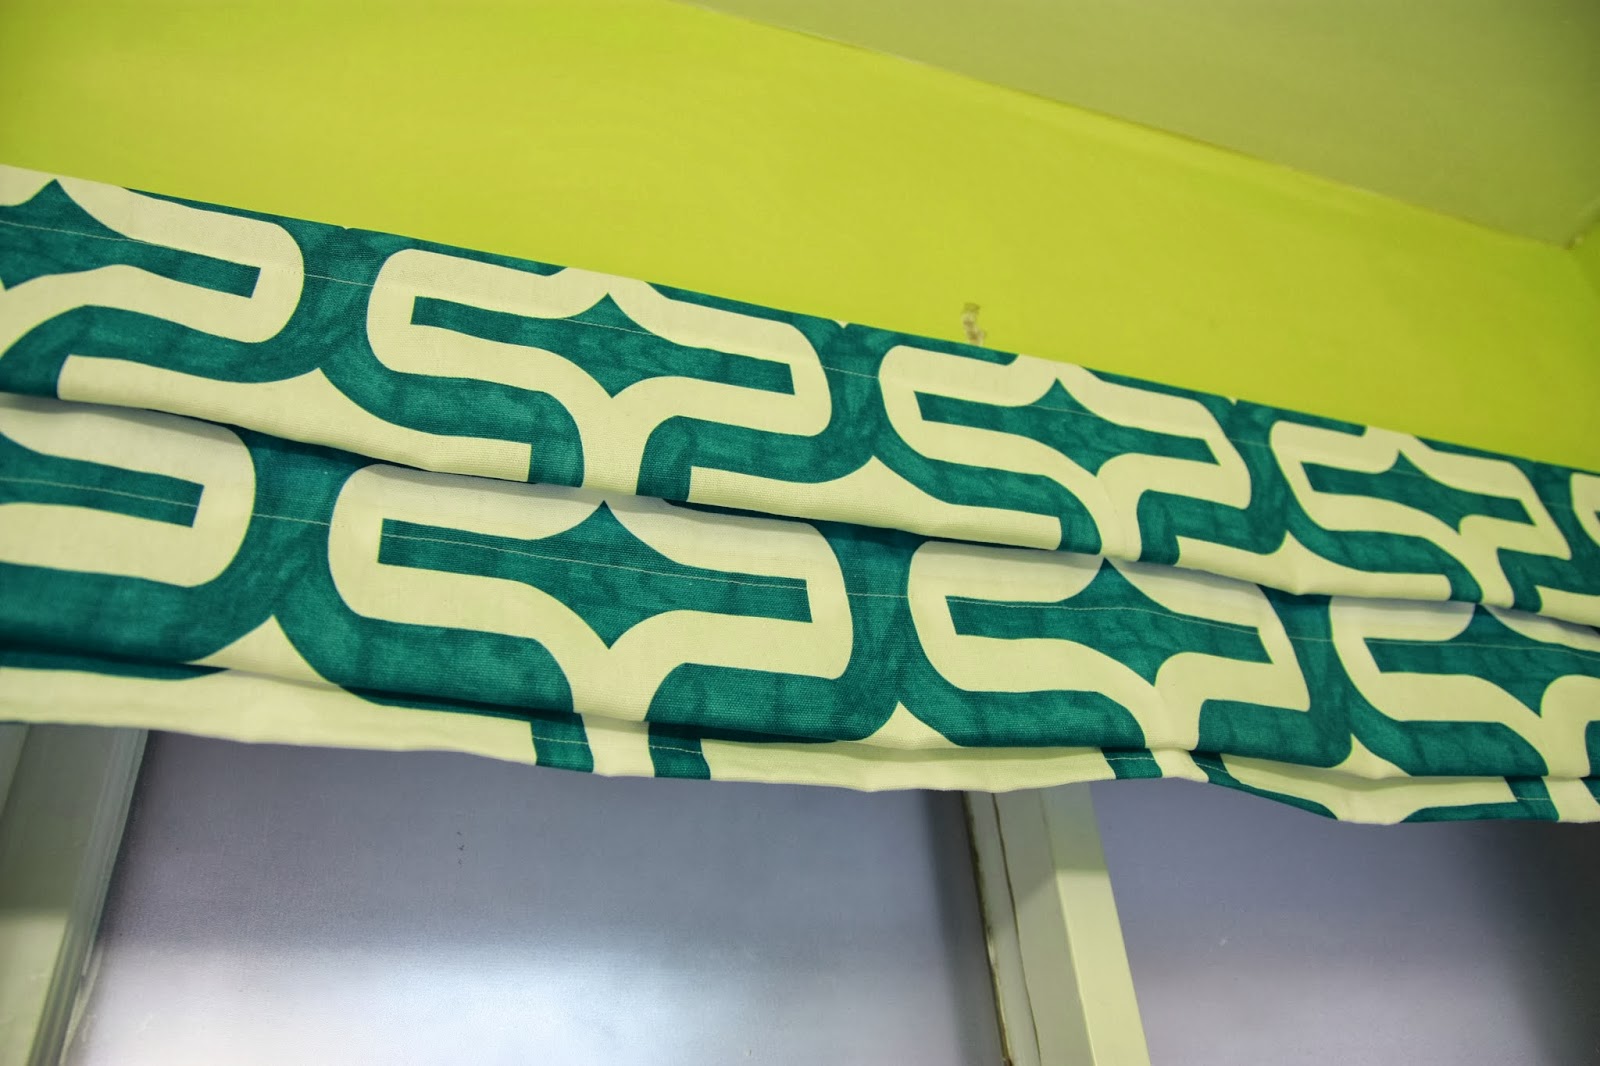
I ended up going to Hobby Lobby (Hobb Lobb) and picking up 3/4 yrd. of Duck Cloth, which I thought would do really well in the moist shower environment. I picked out a really nice bold pattern because there isn't a lot of space for art, so I knew I could take some liberties. My fabric, with my Hobb Lobb coupon from the phone app, ended up costing $4. If you add that to what I have already spent on paint for this room, that comes out to a nice $8. That's right, less than $10 for a quick make over!

I already had scrap wood that I cut to size to hold the top of the curtain in place. I grabbed my sewing machine, drill, and staple gun and I was ready for faux!


I made sure that the top of my fabric was even by cutting along the line that the printed pattern gave. Then I lined up the scrap wood with the top to see how much space I was being given for seams.


I made it so that I could fold it over the edges of the wood to cover it, but only realized later that it was going to be stapled from the top anyway so that didn't matter. Oh well, no big deal.


I double folded the fabric and pinned it for the seams. Then, I just ran it through the sewing machine. Pretty easy so far.


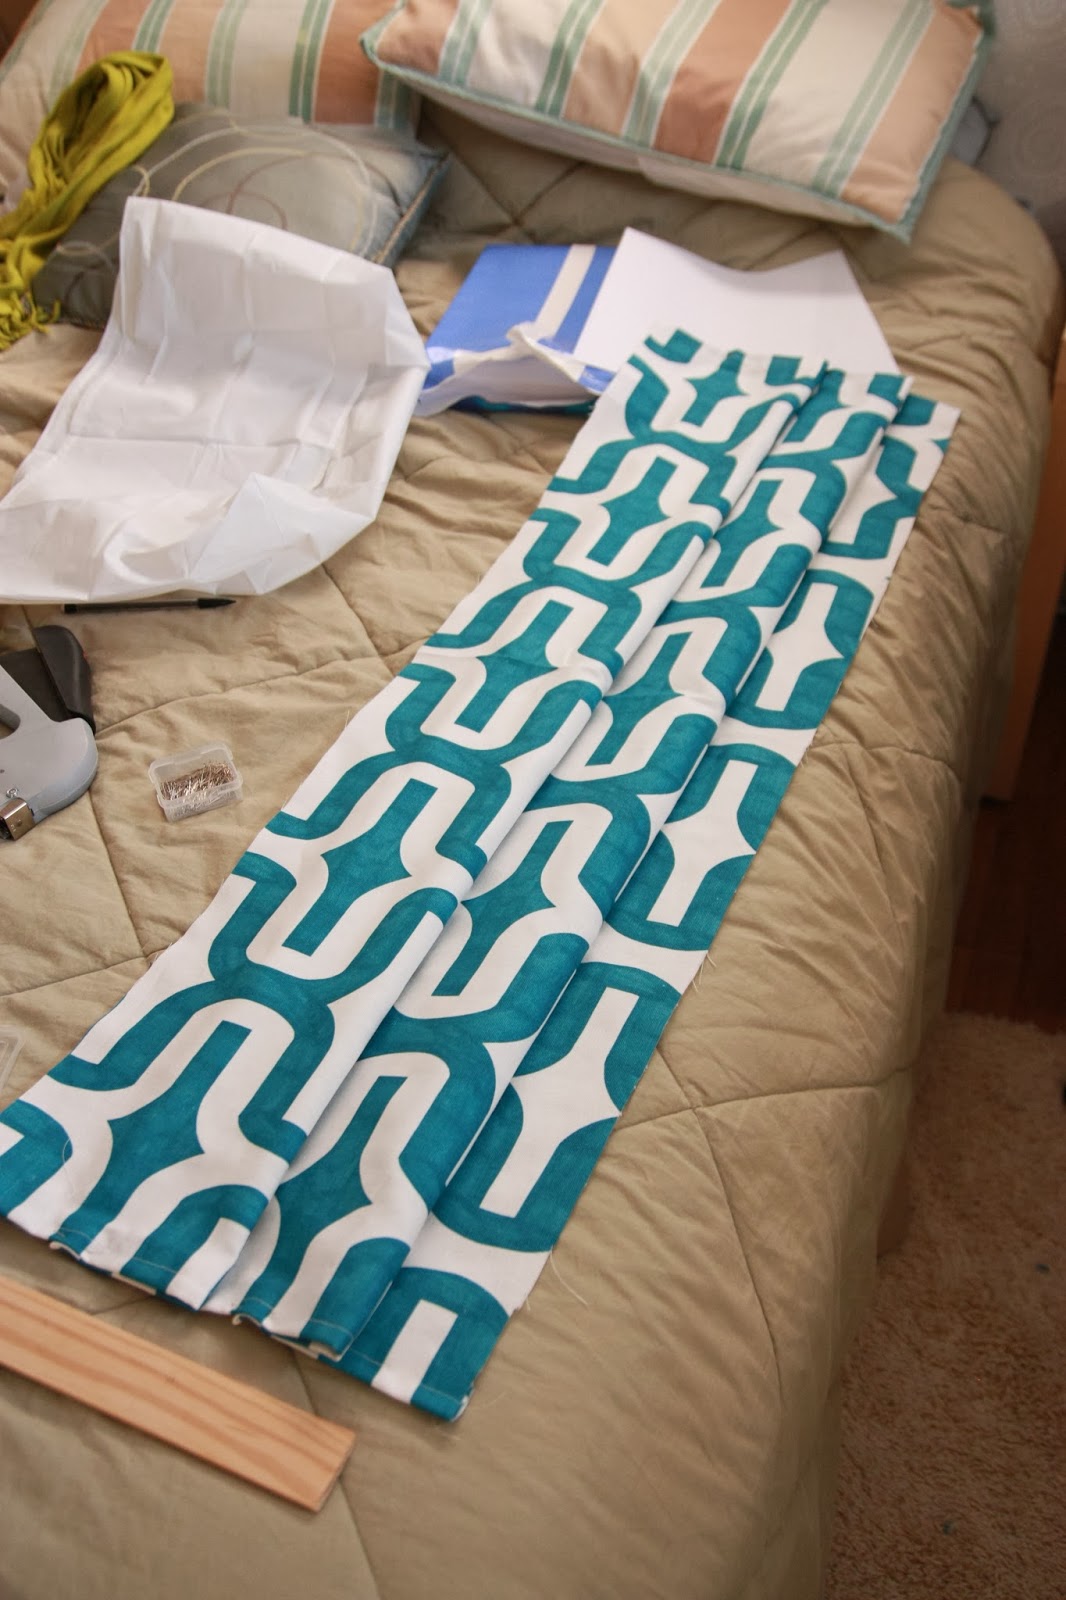
I then laid out the fabric on the bed (I don't have a sewing table), and started playing with the length of the folds. I ended up with this, which I then pinned in place.


I gave the corners of each fold a couple of stitches to hold them in place. I figured that the tension from being stapled would hold up the folds. Spoiler alert, that was a minor mistake.


I made sure that the wood piece was still going to line up.


Then I headed into the bathroom. I predrilled and screwed three screws to secure the wood to the top of the window. I may have gotten a little close with the drill. Thank goodness for extra paint!
Oops.

Then I lined up the curtain and stapled it to the scrap wood. That's when the disappointment happened.

For some reason, the walls look REALLY GREEN in this pictures, but I think it's because it was a cloudy day outside. It's a little softer than eye-burning lime.
In REAL roman shades, there are stiffeners, like dowels, that hold each fold up. Essentially my blind had no structural integrity, so it collapsed. I ended up removing the staples and taking it back down. I ran stitching lengthwise down each fold to secure it and then was able to staple it back up.


It looked much better. Once again, this was a process of trial and error. My Mom made Scott and I curtains for our oddly wide and short bedroom windows (which I will feature when I someday get a coat of paint on those walls!), and made it look easy, so making the fake version in half the size gives me a lot of respect. Good job, Mom!

I have to say, the fake curtain really makes it feel like a real room. The finished product made me really happy I took the time to take it down, fixed it, and try again rather than giving up.


Yay for quick makeovers!

Tuesday, November 12, 2013

Future's so bright, gotta wear...

The windows in our living room have been very lackluster. They had no blinds and the curtains that were up were ones that I had purchased in haste to keep us from being blinded in the mornings by the sun. They were by no means the endgame when it came to the window treatments for that room.


Unfortunately, blinds are really expensive. We really liked the idea of bamboo blinds, but those ranged from $25-$45 depending on where you were looking. Even discount places like the Garden Ridge had them, but for 3 windows, we weren't paying their (still discounted) $20 each.

So when I was taking my weekly stroll through our ReStore on Saturday and saw some light colored bamboo blinds out of the corner of my eye and I decided to take a closer look. They had 5 of them, all wrapped up and in new condition. The best part? Each one was only $5! Perfect! I grabbed three and headed home.


We put them up with a couple of screws each and took down the gray curtains. We couldn't believe the difference they made!


It makes the whole room feel brighter, and they are much easier to adjust than trying to get the curtains to allow in certain amounts of light. The piece of wood that they are directly attacked to is hidden by a flap of the curtain itself, so you can't even see where the screws are, which gives it a clean look as well.


Now that they are up, though, there is one more thing that I think would really make them look finished.

http://www.younghouselove.com/2009/06/email-answer-its-curtains-for-you/

I would really like to hang white sheer or thin curtains around them. I know that they might not seem important, but besides lightening up the space even more, they make the room feel softer and they also filter the light that comes out of the sides of the curtains. I was looking for a reference for this online when I found the picture above. Apparently Young House Love used this same technique and I didn't even know till today! At least I know I'm on the right track (and how cute is Burger?).


For the time being, they are just hangin' around, lookin' awesome. They do make our TV look awful lonely, though, which makes me want to attempt something like this on that wall, but with larger frames. The offset of only having one window rather than the TV being flanked by them doesn't help, but that's why I'm hoping using larger white frames will help the balance. The asymmetry will also add interest to the wall in general.

See, I'm using art school references! Balance! Offsets! Asymmetry!

Education is important.