Monday, November 11, 2013

Frame of Mind

The other day when I decided to refinish the headboard for our bed, it became a very "If you give a mouse a cookie" situation. "If you give a Cait a bedroom, she will want to rearrange it", and that's kind of how all of this came about.

So once the headboard was off the bed, sanded, stained, and drying in the garage, I was left with a couple of hours on my hands. I decided to play around with the way the furniture was arranged to see if there was a way of making the room feel a little bigger. I switched out our two big dressers and took one smaller one out completely. It made a huge difference.


It feels so much better in there now! We can walk around the bed and not have to skirt a dresser every time. It's difficult to tell, but the bed is really not that close to the bathroom door, either. You can also see a light taupe patch on the wall that we would like to use as a wall color in there. The inspiration train was leaving the station!

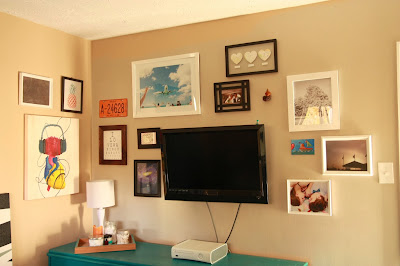
The issue that immediately bothered me though was one that had never hit me before moving the bed: The TV on the wall looks so lonely. I decided I wanted to decorate around it, and after a couple of Pinterest searches and chats with Beth, I found a great way of incorporating and disguising it so that it would fit into the rest of the room better. A frame wall!


What sold me on the idea even more was the fact that the frames wrapped around to the smaller wall. We have a tiny area of wall next to our window that I knew would be perfect for the wrap around effect, so I decided this was the way to go.

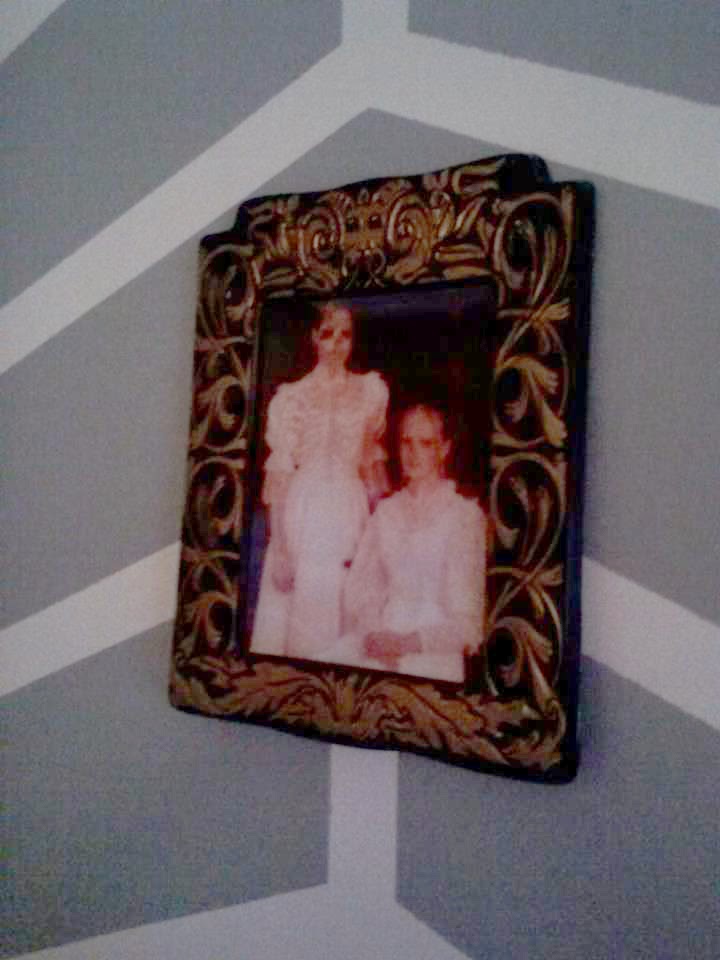
Something like this is what I was going for.


Unfortunately, frames are expensive. SUPER expensive. Even with discounts, sales, and Michaels coupons, a large frame will run around $10 each, and I was in need of MANY of them. Instead of searching for the best deal at a retail store, I decided to just go to my local Goodwill and see what they had. It was perfect! The largest frames that they had were around 30 in. and were only $7.50 where as the smaller 8x10 frames were only around $1 each. I grabbed a bunch and walked out with 6 for $12. Not too bad, eh?

They did need a little work, though.


First, I peeled off the price tags and gave them each a good rub down just to get rid of any dust. Then, I turned them over and began disassembling them.

 
I had to cut out where the indention was with an exacto knife to get the paper up. This doesn't have to be a perfect cut,exposes the backing. This left me with the back of the picture itself and the little bit of cardboard or foam filler behind it.


From here, I took a flat head screwdriver and carefully bent all of the staples up to get them out of the way. Don't get rid of them completely, though, because you can reuse them to hold your own picture in the frame. They can be seen here.


Then, carefully take out the backing, the picture AND the glass to get it out of the way. Store it somewhere safe for use later. Be sure not to break or throw it away. This leaves you with the frame itself.


Take a spray primer and give it a good coat or two so you can give the paint some adhesion. Then give it a coat with whatever color paint you want. Allowing for drying time, the whole process takes about an hour and a half, so you can do a bunch in batches.


Clean the glass that you took out of each frame and then put in your own art and bend the staples back into place. You're done! So easy (and cheap!), but not cheap looking. When all my frames were up, I was really pleased with the result.


I opted for different colors of frames randomly spaced (because some of the framed art we already had before the project), and I really like the texture that it gives. Having the other squares and rectangles around the TV really helps not make it stand out as much when it's off, leaving the room much cozier than it would have been otherwise. I love the result! Between this and the headboard going on the bed, the room is certainly taking shape.

Does this inspire you to run to a Goodwill for some frame goodness? Let me know in the comments!

Saturday, November 9, 2013

A Not New Redo

Scott and I have focused so much on the other parts of the house that we haven't had a moment to really turn our attention to our own bedroom. What makes it worse is the fact that we spend all this time in the other, more comfortable rooms, then go to sleep in the most unfinished of them all.

I knew that I wanted to paint and put up some pictures, but to begin this Journey to the Center of the Bedroom, I knew that I really wanted to emphasis the bed. I had seen a lot of bedrooms in lighter colors that have darker headboards, and they really caught my fancy.


The headboard that we had was actually one that my dad and I built a while ago, but that I still love, so I wanted to try to work with it. Unfortunately, it was disappearing behind our much darker bedding.


I decided to take it off and refinish it in a darker color. First, I unattached it from the bed and took it out to the garage.


Here you can see better the alternating wood pattern that we accomplished. Because I had to sand it to get off the old polyurethane, I also had to sand the pattern. If you ever encounter anything like this, remember that you must sand with the grain, even if that means the job will take longer. It's worth it. I also used my mouse sander and 120 grit sandpaper and it made the job a little easier. Sanding took close to two hours in all.


When I had it completely sanded (front, panels, sides, sunken portion of the frame, top), I took the shop vac and gave it a good once over. Then, I wiped the whole thing down with a barely damp rag and let it sit for an hour.


During the hour, I ran to Home Depot and picked up some stain. I wanted to get a smaller container of the one I liked, but unfortunately, they didn't offer it, so I ended up with the $7.99 can. I didn't want a color that came across as a black, so I ended up with a darker wood with not a lot of red in it: Jacobean (which in my mind, I seem to pronounce 'yakobean', lol).


I would use my foam brush to brush on some of the stain, then I would use a soft cloth to wipe off the excess. I started with the leg to make sure I liked the color. That way, If it was too dark or too light, it would be behind the bed where no one could see it.


I then continued around the frame in the same fashion. Brush then wipe. I wanted it slightly darker, but rather than leaving it thick (which makes it really sticky and doesn't dry properly), I waited until after the first coat was finished to do a second coat later on.


Same rule applies for sanding as staining: go with the grain. That's part of the reason I left the interior portion for last. I just carefully went through, making sure not to leave any bubbles with the stain, and brushed and wiped each individual rectangle separately.


The difference in color was pretty amazing. You can see how much darker the stain was than the original wood color, and it just made it feel much richer.


When the first coat was finished, I let the entire thing dry for 4 hours. I then applied another coat to darken it slightly and allowed that to dry over night. Two more coats of polyurethane later, and it was looking pretty snazzy.


Because our weather has been really cold and windy lately, I wanted to make sure that the headboard was super dry before it touched any of our bed linens. I brought it in and let it stay overnight in the dining room so that it could sit in a dryer, warmer environment for a while. This made all the difference because the finished piece felt much less sticky and more completed before attaching it back to the bed frame.

This little make over took our bed from this

To this

Which is quite an impact for such an easy DIY. We love it!

(Yes, we did move the room around a little too. We also took on another project in there, but more on that in a later post!)

Thursday, October 31, 2013

Haunted House

We're big fans of Halloween (if you hadn't figured it out already), so when we decided to have a party last weekend, we really wanted to trick out the house. Here are a couple of my favorite (spooky) things.


Two bags of spider web later, the ceiling of the living room was appropriately webbed. Though not pictured, we ended up throwing a bunch of little plastic spiders all around it and it really helped set the mood in the place. It was a really fun element, but kind of tricky with the fan. Be sure to secure the web tightly above so it doesn't get caught up in it!


In the family room, I found this window cling that really haunted the place. With the giant white shade behind it, our headless lady has been haunting our neighborhood for two weeks. The best part is that it works both ways. We walk through the room all the time and have to remind ourselves that no one is outside looking at us (without a head)!


This is actually something I picked up from Young House Love (one of my favorite home blogs). Just cut out the shape of the bats out of black craft paper and tape it inside the shade. We also switched out the light bulbs so that they were appropriately scary. This lamp ended up being blue.


In another recent post, I talked about putting together my centerpiece for the dining room. We also added a red light bulb to the drum light to really add a finishing touch to the creepiness. We eventually finished off the table by putting a spiderweb table cloth on it.


Also in the dining room, we took down our big pictures and put up these guys. As you walk from one side to the other, they change revealing ghoulish secrets in each photo. They were $1 each at Target.


Last but not least (We did decorate more, but these are just the highlights), I decided to make our guest bathroom super creepy. I took some red paint and wrote 'HELP' and put a couple of gross hand prints on the shower curtain liner that we had. Then, we put a some flickering tea lights behind it. We also took one of those fake arms and had it coming out of the floor vent, so when you turned the light on, it looked like it was trying to grab your ankles! ooOOOoooo! We only left the bathroom decor up for the party, though. It wasn't amazingly functional, but it did creep out people on the day of!

Happy Halloween! Did you decorate? Have fun partying or trick or treating tonight!