Showing posts with label refurbish. Show all posts

Monday, October 5, 2015

From Entertainment to Booze Containment

A phrase that Scott hears all the time around this house.

"I found this on the side of the road".

Sometimes it's little things and sometimes it doesn't work out. This was not one of those times.

This time turned into one of our coolest furniture pieces ever, but I'm getting ahead of myself.

About a month ago, Beth and I were driving back from one of our many shopping adventures when we saw an old TV carcass on the side of the road. We both saw it and while the words, "Did you see that?" left her mouth, I was already pulling a U-turn. Five minutes later, it was loaded into the car.

"Scott is going to kill me".


When we first picked it up, I didn't really have an immediate use for it. I thought it might be a pretty cool microwave stand with storage in the interior portion, but we wouldn't know until we got it home and took a good look at it. Once we had it out of the car, I began to doubt my original intention.


I decided that the only way to know would be to try it out. I gave it a "dry run". Anything would work better than the collapsible plastic table we've been using since we moved in two years ago.

Blingy.

I gave it a try.


Not quite. It wasn't wide enough for the wall and it seemed like it was awkwardly floating in the space.

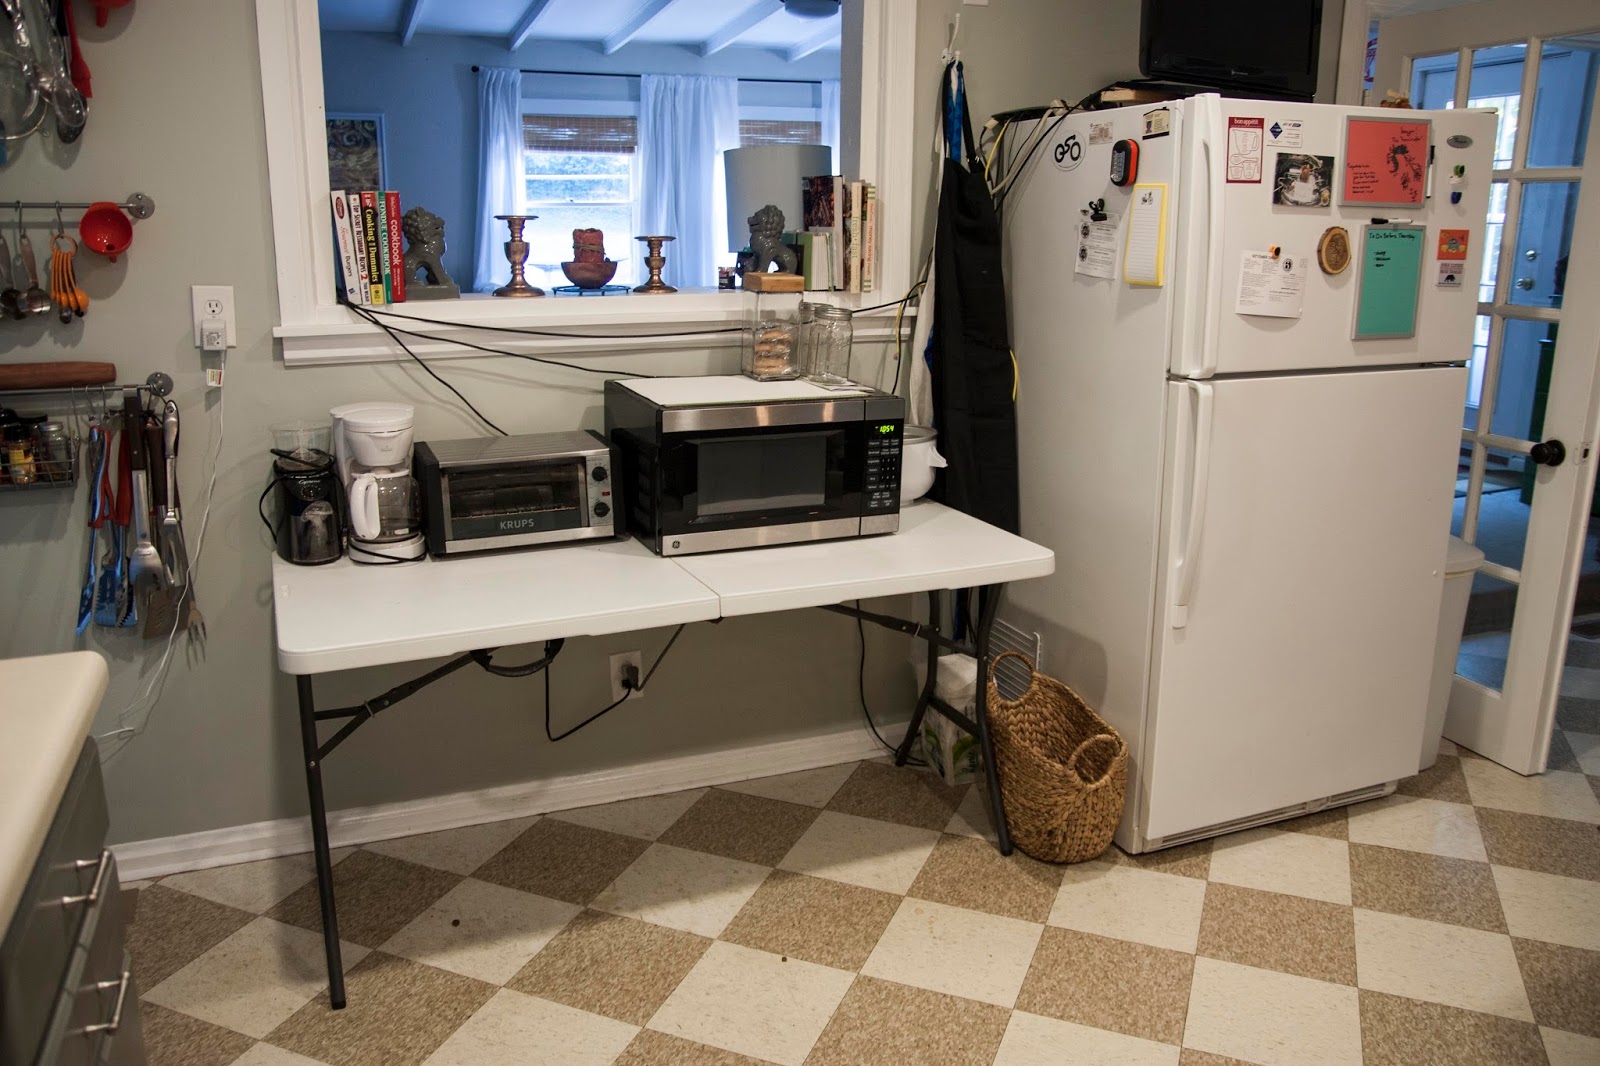
This also happened to be the weekend that my parents came into town with the mantel, so we thought it over and decided that it would be much cooler as a retro TV bar instead. We would switch it out with the old bourbon bar and put the old one into the kitchen to hold the microwave and toaster oven. The end result for the TV would hopefully look something like this inspiration picture from a Redo, Recycle, Renew article online.


Honestly, Dad had half this project done before Mom and I even got home from picking a few things up from the store. The hardest/most expensive part of the project would be finding an old TV without the television actually mounted inside, and since I had found that for free, we were only a few steps from a cool mid century bar display.

We started by removing the backing and cleaning up the inside a little.


The speakers possibly still work, so we didn't cut the wires. Scott thinks he might want to try hooking them up to our old record player someday, so we just tucked the wires away where they wouldn't get damaged.

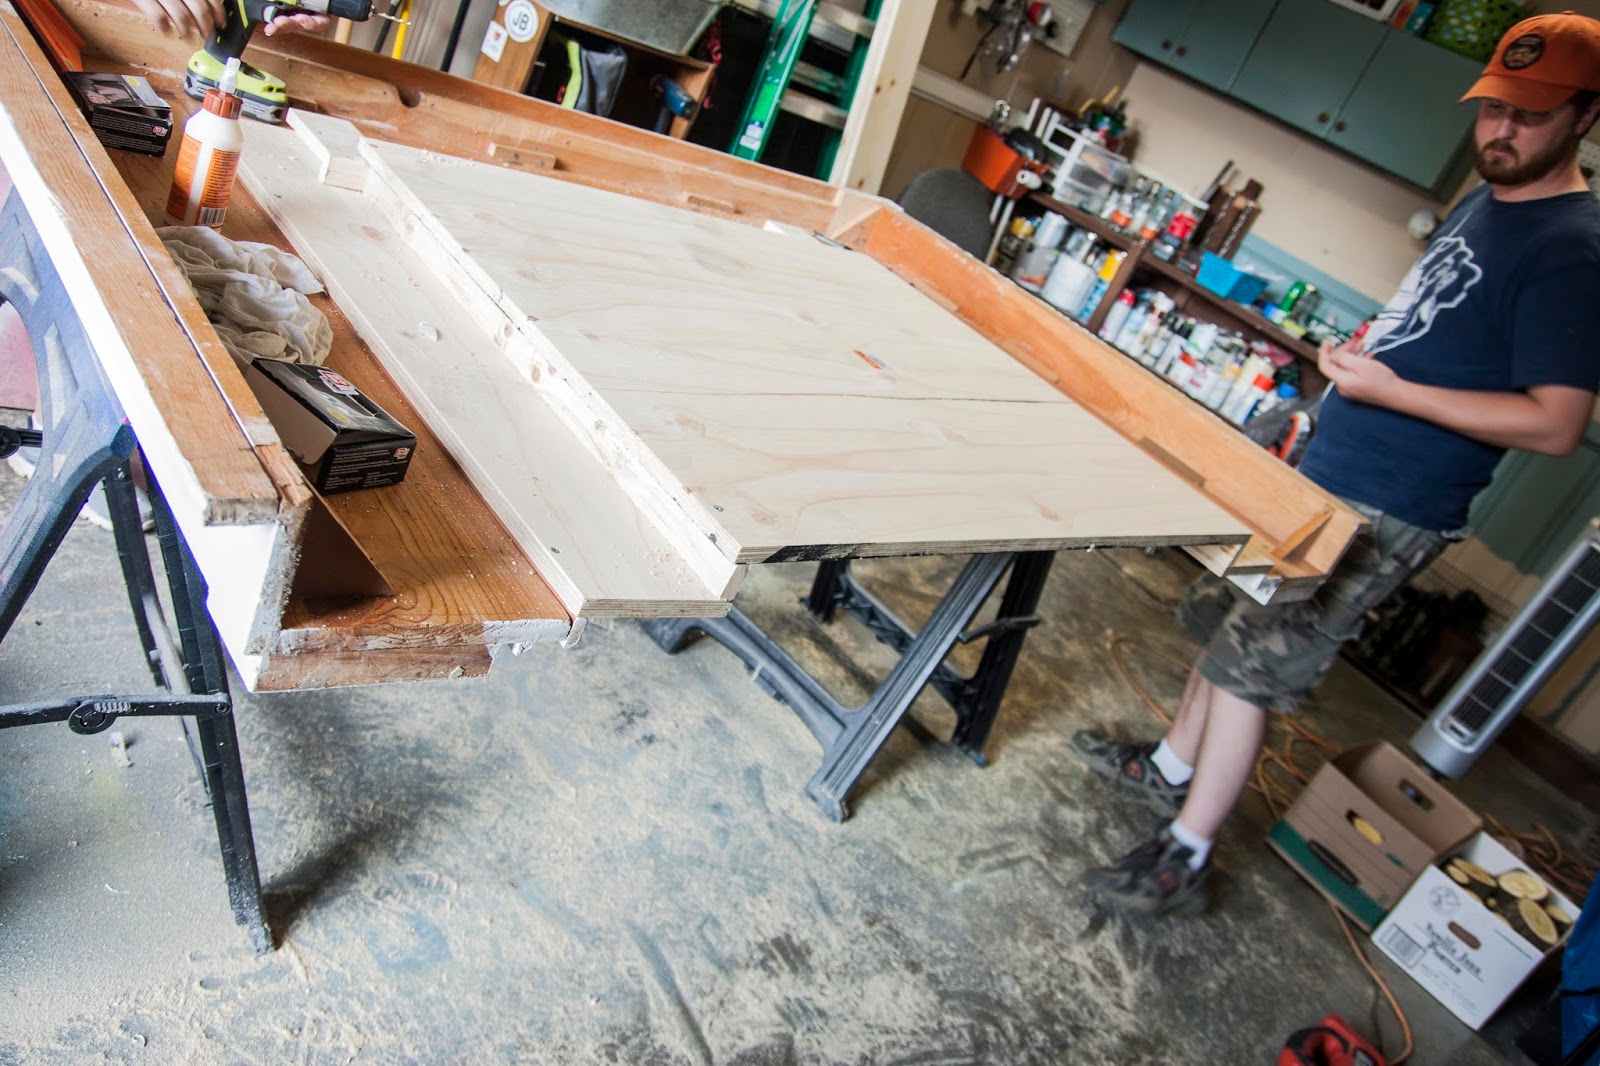
Dad measured the inside and used pine boards to make shelves. The two support slats in the back weren't removable, so he figured out a way to screw everything together once all the pieces were inside the TV itself. He refers to this as his "IKEA method" because all of the holes were pre-drilled and just needed to be attached.


Once everything was fitted, I took the shelves out again and stained them with a honey-colored gold stain. We thought that it would go with the honey color of the bourbon and the exterior colors of the original television shell. Once they were dry, they were brought back inside and reassembled back inside the TV again.


In the above picture, Dad is trying to make sure that the shelf height is correct before the shelves are stained. This is when Mom and I started working on the rear curtain. As a stand in, Dad used an old towel, but we thought that we could do a little better.

We used a tension rod and some upholstery fabric (seamed, with a curtain pocket on one end) to hang behind the shelves. We really liked the fabric in the inspiration photo, but we didn't expect to find the exact same fabric. I think it fits perfectly with the retro feel of the TV and gives a nod to the television test pattern.

When it was finished, we moved it into place. A little rearranging turned this:


Into this:

Since we were working on the mantel at the same time, you may recall the story in a previous post about the positional switch-a-roo that occurred between this guy and the fire place.


One more thing had to happen before I called this project completed. I found some lights around the house that had a dimmer and installed two of them into the "ceiling" of the interior of the bar. Now it has three light levels to choose from to really give it a fun, "working TV" glow.

Yes, I know some bottles are backwards and sideways. We aren't getting paid ad monies, ya know.

Overall, I'd say this is one of the coolest, most unique things we have in our house. It's a fun throwback to the times of I Love Lucy and Gunsmoke. A reminder of how far media has come in the last 60 years.

Most of all, it was yet another fun reason for me to tell Scott,

"I found this on the side of the road".


Let me know if you have any awesome furniture make overs and I might feature it on the blog!

Sunday, September 13, 2015

Faux Fired Up

It all started with a text from my mom. She had found a mantel at her local Restore in Tennessee for around $66. The text was accompanied by this picture.


After asking some questions and thinking it over, I texted her to pick it up. This began a three week journey for this fireplace accoutrement, from Restore floor to our dining room.

I had wanted a mantel for our dining room since we had moved in. It didn't need to work, it just needed to be a traditional representation of what a dining room means. It tends to be a place where people gather around a fire/table and be together. I also liked how it gave a more official dining room feel to a room that was originally the living room. It had always needed a little help not feeling like an after thought of an area.

On Pinterest, of course, I had fallen in love with this image from the blog Bless'er House.

It was visually demanding, yet very airy in the room. I loved the stone surround, but especially the wood cuts in the center. It was a definite inspiration for what our new acquisition was to become.

Since Mom and Dad weren't going to be in town for a while, they ended up storing the mantel for us. I slowly started receiving text updates.

Would you like me to strip the paint off?

I might be able to get a coat of paint on it before we bring it to your place.

Suddenly, the mantel was being worked on and I was getting pictures. I am pretty sure she was having as much fun working on it as I would have.

Here she is using a heat gun to remove the old paint. The original paint job was chipping and needed to be completely redone. She tried stripper first, but the heat gun apparently worked best.


She was then able to scrap off the old paint with a metal putty knife. I wouldn't recommend a plastic one because it might melt.


When she really got going, she had taken off all of the original paint. In all, she said it took 16 hours! Never say I don't owe my mom!


She followed up with stainable wood putty, some sanding, and a coat of white paint. The next time I saw it was when their truck pulled into my driveway. It looked great already! There was still much to do to install it, though.

We brought it inside and set it where we wanted it. After giving it side glances overnight, Dad brought up the idea of adding a hearth to the bottom. This would both lift the mantel off the ground and away from the moulding, but also help complete framing around the interior portion (where the wood or fire would normally go).

Dad and Scott started with a simple frame with 2x4s.


Then they skinned it in some nicer plywood. We had purchased a 4x8 ft piece at Home Depot and ended up needing most of it for the entire project. Strips of it were cut to size to skin the hearth. They were then attached with wood glue and nails from our nail gun.


Dad scroll cut the sides from a template Mom drew to fit it against the moulding and we brought it in to take a look.


We thought it looked pretty good, so Mom and I put a couple of coats of white paint on it while the boys started work on the actual mantel itself.

First, they added about a 6 inch surround to the interior of the mantel. This would keep the wood pieces from being visually overwhelming and also help it feel more realistic. They did this using the same piece of plywood from earlier.


Then, they attached small pieces of 1x2 around the opening as spacers to set back the interior piece a little. This added some nice dimension to the over all look.

The interior was yet another piece of the plywood. I had painting it black before they installed it so it would be easier to work on later. When the structure was completed it looked like this.

Notice the stair stepping of the layers.
At this point, the mantel now weighed twice as much, but of course, we weren't done. We carried it inside and checked it in its place. We were chugging along nicely.

Spiffy

We brought it back outside and began working on the interior and finishing stages of the process. I painted the inside of the opening black to match the background. Then we were off to the woodpile.


Dad used this chainsaw and cut through a bunch of our branches that we have around for the fire pit. He eyeballed the size and was impressively accurate. For the smaller branches, he was able to set up a stop on our miter saw and get the same size every time.


While he cut, I began placing the pieces in the interior area of the mantel. After about 30 minutes, we had a very pleasing arrangement.


To attach all of the wood pieces, we had a very odd system (that worked really well!). Dad laid under the saw horses and I used a drill to drill a pilot hole from the top under each piece.


Then Mom came in and glued each piece down while Dad screwed in each log from the underneath so it didn't show. It looked a little something like this.


After about 20 minutes and my father being thoroughly covered in sawdust and glue, we were able to set the fireplace on end.

From behind, you can see alllllll the screws.

Of course, now that it was about 1,000 lbs, it was time to move it inside.


The hearth was first attached with L-brackets and anchors to the wall.


Then the mantel was attached using two screws with anchors as well.


It looked great! There was just one problem...

It was in the wrong place.

When this all began, I had measured the far wall to see if the two bookcases and the fireplace could all fit together. It seemed like the fireplace being centered would give that traditional vibe I was going for.

Unfortunately, numbers make fools of us all. I had measured and written down the wrong number. After living with the mantel on the side wall for a couple of days, my curiosity got the best of me and I remeasured. Sure enough, it would totally fit (with extra space) on the far wall.


I very sweetly told Scott that I had royally screwed up and he agreed to help me move it. The move, I must say, really helped cement this as one of my favorite house projects so far.


Much better!

What do you think, is it worth having an architectural piece if it doesn't work, or are fireplaces meant to be used, not just seen? I have to say, even though this guy will never heat our home, I'm already a big fan of how grand it makes the space feel. I can't wait to spook it up for Halloween and hang our stocking on it at Christmas!


PS-See the retro TV on the right? My Found TV Bourbon Bar Blog Post coming soon!

Thursday, April 23, 2015

One if by land, Nine if by Spray Paint

When we got married, we did a lot of the wedding DIY. One thing we were really lucky on were some lanterns that we picked up from Pier 1 for only $3 each. They were metal, green, and had panes of glass in them to hold our centerpieces for the tables at the reception. Notice it holding the white flower in the bottom center of the picture below.

During our Father/Daughter dance. Photo taken by Ronda Sturdivant.

Not only were they perfect for the day, but we kept them afterward and now they adorn our backyard during the sunny months. Unfortunately, when I pulled them out this year, I could see the evidence of summers past.


They were a little worse for wear. They weren't rusted, just really sun-worn and dirty. Since metal lanterns this size are really in style now, I didn't want to replace them. That would have cost a fortune. Instead, I decided to just revamp the ones I had and make them like new again.

I started by taking them apart. The top wire and lids come completely off, so I washed them with dish washing soap. I let them dry really well while I worked on the next step.


Some of the lanterns had candles still stuck in them, so before I could really proceed, they had to be dewaxed. Here is a perfect example.


After an hour in the freezer, the candle shattered enough to come right out in chunks. Thankfully they were not all this bad. I think I would have run out of freezer space...

I was then able to do a first cleaning. I ran each one underwater with soap, rinsed, then put them back on the counter for the second big phase: taking out the glass.

The glass pieces were held in with little metal tabs that just needed to be carefully bent back. I only had to undo the top ones, as I was able to pull the glass straight up and out of the lanterns. There were four pieces per lantern (to keep candles from blowing out in the wind), so this task took a while.


Once all the glass was removed, the lanterns were rewashed. They weren't perfectly clean, but they were clean enough that the dirt and grime were gone from the outside, allowing the paint to stick. They were then allowed to dry.


The glass was all cleaned as well, then very carefully laid out to dry.


Once everything was a-okay, I was ready to paint. I decided on a bright yellow because it would really stand out against our very green backyard. I ended up using two cans of the Rustoleum with primer to get a nice even coat.


I began with them upside-down. I then flipped them right side up and got the top edge. I did not do the insides because I felt that the pattern didn't make that necessary. When you do see both colors, they just look like lemon lime.

When they were completed, I laid out the lids and painted their undersides first. After they dried, I flipped them over and sprayed the tops. Each side took two coats for good coverage. The wires were painted by hanging them from a string so I could do all the sides at once. They only took one awkward coat.

When they were completed, I brought everything inside for reassembly. Here is the inside of one that I'm getting ready to put a glass pane in. You can see how the inside is still green.

 
It's amazing what a new coat of paint can do for something. If you know me, you know that I'll spray paint just about anything, but these guys are probably my newest triumph.


Not only are they clean, but they are bright and cheery spots in our backyard.


I'll update with a night picture once our weather is nice enough to actually get one. Till then, I hope your outdoor projects are allowing you to enjoy your yards, too!


Friday, October 3, 2014

Little By Little

The garage has been an ongoing project in the house. When we moved in, we knew it would need some work. It was in good shape, it just needed some storage and counter space so we could accomplish more things throughout the rest house. We started by getting the entire garage generally organized with what was already built. For more on that, check out the blog post here.


Since the initial clean up, we've managed to work a little at a time to give everything a home. It's probably been about six months, but it was totally worth it.

After the above pictures was taken, I tore out the far side of the shelves to leave more space for walking into the garage. Scott also mounted the two blue cabinets (that were originally in our tiny laundry room) so we could have some elevated storage space. Sorry about the quality of the rest of the pictures, they were all taken with my phone.


Still a mess, but a mess in progress!

I found some pegboard about a month ago and attached it to the wall with some 1x1s that we had in the scrap wood pile. For all of $14, we finally had a place to put our tools! Previously, they were literally in a heap on the ground just outside the garage door. Safe, right?!


One of the pegboards is dedicated to just hand tools. I even used our old kitchen knife magnet (right) to hold chisels and saw blades.


The other is just for painting equipment. Paint trays are perfect to stick on pegboards because the feet just loop over the top. Easy peasy!


It's amazing how much storage space all of the paintbrushes, rollers, tape, and putty knives took up! Once they were out of the way, we could move on to Phase 4: Workbench.

This was probably the most arduous task...

Not really. It was easy. I just pulled off the top shelf of the existing unit and called it a day.


It's the perfect workbench height and once we mount lights (currently sitting on the workbench) under the metal cabinets, we will have a great space to work on all kinds of projects, big and small!

I know this probably isn't exciting to anyone but Scott and I, but believe me, "Woohoo!"s are in order. We can finally walk into the garage, grab a screw driver, complete a task, and put the screwdriver back without threat of being stabbed or cut from some errant blade or saw in our 'Tool Pile'. We also have enough space to work on smaller items that might need soldering or some simple repair without having to use the kitchen counter.

The only downside is that we only have one outlet in the garage...and it's on the other side of the car itself. We need to put an outlet or two near the workbench to really make it fully functional, but for now, we're just happy to have something resembling an efficient work space!

Do you have a work area like this in your garage? Do you think it's useful or a waste of storage space for other items? Let us know in the comments!