Thursday, April 23, 2015

One if by land, Nine if by Spray Paint

When we got married, we did a lot of the wedding DIY. One thing we were really lucky on were some lanterns that we picked up from Pier 1 for only $3 each. They were metal, green, and had panes of glass in them to hold our centerpieces for the tables at the reception. Notice it holding the white flower in the bottom center of the picture below.

During our Father/Daughter dance. Photo taken by Ronda Sturdivant.

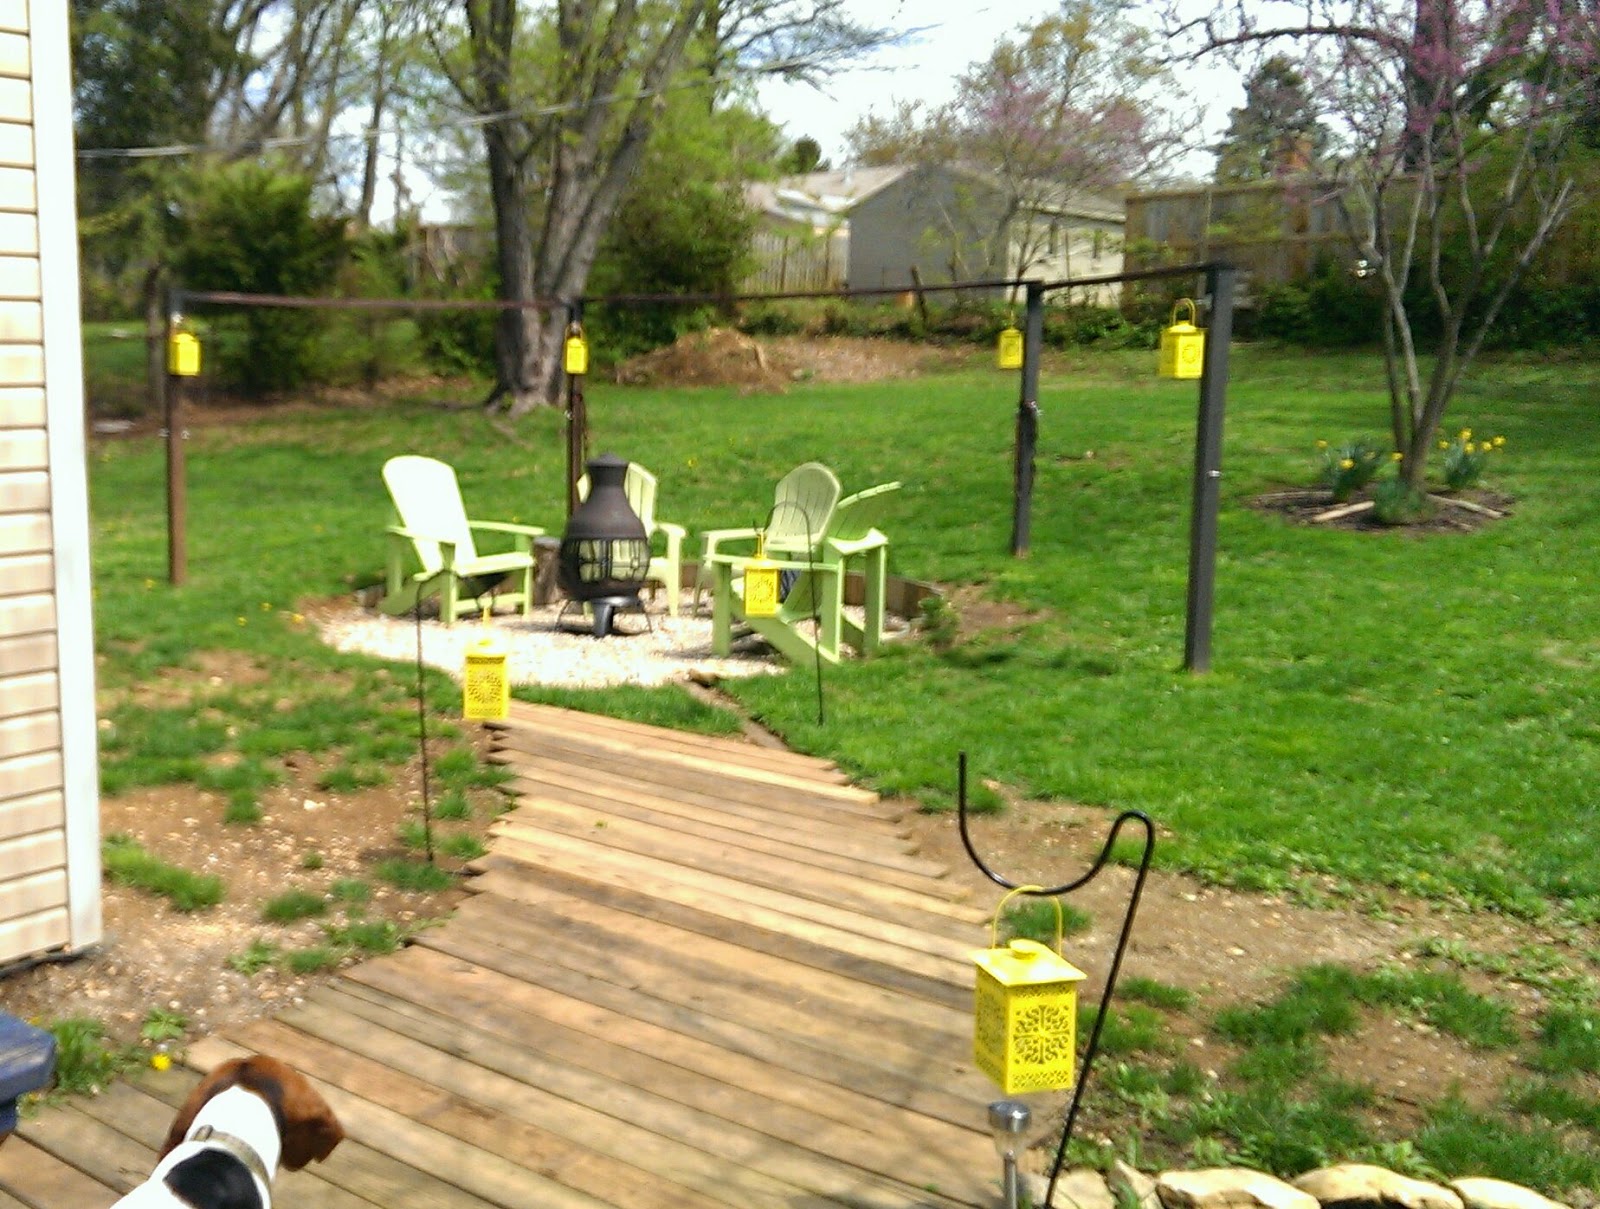
Not only were they perfect for the day, but we kept them afterward and now they adorn our backyard during the sunny months. Unfortunately, when I pulled them out this year, I could see the evidence of summers past.


They were a little worse for wear. They weren't rusted, just really sun-worn and dirty. Since metal lanterns this size are really in style now, I didn't want to replace them. That would have cost a fortune. Instead, I decided to just revamp the ones I had and make them like new again.

I started by taking them apart. The top wire and lids come completely off, so I washed them with dish washing soap. I let them dry really well while I worked on the next step.


Some of the lanterns had candles still stuck in them, so before I could really proceed, they had to be dewaxed. Here is a perfect example.


After an hour in the freezer, the candle shattered enough to come right out in chunks. Thankfully they were not all this bad. I think I would have run out of freezer space...

I was then able to do a first cleaning. I ran each one underwater with soap, rinsed, then put them back on the counter for the second big phase: taking out the glass.

The glass pieces were held in with little metal tabs that just needed to be carefully bent back. I only had to undo the top ones, as I was able to pull the glass straight up and out of the lanterns. There were four pieces per lantern (to keep candles from blowing out in the wind), so this task took a while.


Once all the glass was removed, the lanterns were rewashed. They weren't perfectly clean, but they were clean enough that the dirt and grime were gone from the outside, allowing the paint to stick. They were then allowed to dry.


The glass was all cleaned as well, then very carefully laid out to dry.


Once everything was a-okay, I was ready to paint. I decided on a bright yellow because it would really stand out against our very green backyard. I ended up using two cans of the Rustoleum with primer to get a nice even coat.


I began with them upside-down. I then flipped them right side up and got the top edge. I did not do the insides because I felt that the pattern didn't make that necessary. When you do see both colors, they just look like lemon lime.

When they were completed, I laid out the lids and painted their undersides first. After they dried, I flipped them over and sprayed the tops. Each side took two coats for good coverage. The wires were painted by hanging them from a string so I could do all the sides at once. They only took one awkward coat.

When they were completed, I brought everything inside for reassembly. Here is the inside of one that I'm getting ready to put a glass pane in. You can see how the inside is still green.

 
It's amazing what a new coat of paint can do for something. If you know me, you know that I'll spray paint just about anything, but these guys are probably my newest triumph.


Not only are they clean, but they are bright and cheery spots in our backyard.


I'll update with a night picture once our weather is nice enough to actually get one. Till then, I hope your outdoor projects are allowing you to enjoy your yards, too!


Friday, April 10, 2015

A table a day...

It would seem that many of my projects involve 10% perspiration, 90% Pinspiration. These two little tables are no exception.

I was browsing my favorite image based bookmarking site when I came across this eye catching and simple solution to a DIY side table.


Originally put on Pinterest by Home Depot, this table was exactly the kind of quirky piece of furniture I was looking for to go between my chairs in what has recently been dubbed The Salon. (That is, the area that was the original dining room in the house, but is now just an awkward spot off of the kitchen.)

I checked out the DIY instructions for the table here, then looked online to see how much this baby would cost. Due to the fact that it was 30 ft of copper pipe, it would cost the same to buy something pre-made as it would to build it.

I showed Casey the pin and she came up with the simplest answer: PVC. Use PVC to make it, then just spray it copper for the look!

DUH! Of course!!!

PVC was a mere $2.21 per 10 ft vs $11 per 10 ft of copper pipe of the same width. I purchased 3 PVC pipes and brought them home.


I used some painters tape to tape all three together, making sure they are all lined up with each other. I then marked 12 in. and cut them with a jigsaw. I continued this until I had the 30 pcs it asked for.


There might be some rough edges on your pipes. These can be cleaned up with an X-acto knife.

I then brought all the pieces inside and began putting them together. I ended up using the image more then the instructions, but either way, it's not too difficult. I also used heavy gauge wire rather than twine, I felt that it would make the table more stable.


When it was completed, it looked pretty good. This is the hardest part of the project and it doesn't really take that long to do.

To make sure that it would at least be sort of level and wouldn't fall over as soon as it had a table top, I used an old shelf from my office and a lamp to see how sturdy it was. It was actually surprisingly solid, so I was able to move on with the finishing steps.


I knew that I wanted to paint my PVC, so I decided to prime over all of the areas that had red writing. To make it easier on myself, I hung the entire base from the garage ceiling and used my spray primer from there.

Notice outside: "Weather"


While it was drying, I was able to run to the Depot and grab a table top. They had them premade out of pine in the lumber area. The smaller size was about $5.88 while the larger size was $6.88. I had waiting until the base was made to get the right size, so I knew that the larger of the two options was right for me. Keep in mind, I also cut my struts to a foot in length instead of the ten inches that the instructions originally called for, so if you are making the other size, you might get away with the smaller table top.)

I stained it and sealed it using stain that I already had on hand.

I checked on my primed PVC and the red lettering was fighting my primer, but I figured it would probably be rough enough to take the copper paint. I ended up at Hobby Lobby because apparently copper paint isn't as common as silver or gold. My issue was that I wanted bright copper, not rusted, aged, or hammered copper.


I gave the entire base a good coat.


Once everything was dry, I attached the bottom to the top with copper brackets that I had purchased for my 3/4 in pipe. I only had to use three. I also used screws instead of the nails that came with the brackets.

When I was finished, I was pretty pleased. It looked a lot like the picture.


And the copper paint really helped pull it together, especially with the rug that I purchased to replace our old one.


The Salon was looking pretty good.


And today I decided to make a simple table top for an empty planter in the backyard. It's now a spiffy place to put a drink or popcorn while sitting next to the fire.


The cost was $0 because I just used a couple of pieces of scrap wood.

What do you think? Would you venture to try making either one of these? There are so many possibilities with the basic elements of them that no two tables need look alike!

Friday, March 27, 2015

Tweak of the Week

When we last left our kitchen, it was looking pretty bright, fresh, and very close to my mental image of its full potential.


The original intention of our pendant lights was for them to act as task lighting for our peninsula, but now that we have the can lights, the room is pretty evenly flooded with bright, useful light. That's when it occurred to me that our pendants could stay, but could act more as accents to the room rather than work lights.

I have been pinning kitchens for years that have caught my eye. Something I hadn't noticed till recently was what they had in common: their pendants were mostly clear, globe shades with exposed bulbs. Here is a perfect example from Southern Living.


I looked up a couple of these lights and found that they were completely out of our price range (especially since we already had working lights there). $100 each? Heck no. West Elm can keep 'em.


It was time for a little DIY.

I decided that this was certainly something I could tackle on my own. I researched glass cutting on Pinterest and found many tutorials on how to cut holes in glass. The issue I ran across was that the hole that they would show being cut was kind of small. They were able to use a large bit and do a single cut. I had to make a hole large enough to feed in the part that sandwiches the shade which was much larger.

I looked at large diamond tipped bits (for glass cutting) at Home Depot and Lowes. The smallest one they had was $20...for one bit. After I was able to recover from the shock, I regained my senses...and headed to Harbor Freight.

Anyone who frequently DIYs knows that Harbor Freight is the best.

I wasn't able to find any drill bits there, but I was able to get a multi bit diamond tip set for my Dremel for around $7. Score.

I also grabbed two $6 fishbowls from Michaels and a can of Metallic Silver Rustoleum spray paint from Home Depot. All in all, the project probably cost us $20 in all.

I began by covering my fishbowls in painter's tape. This would help give the bit purchase when I first got started. It also kept it from hitting the glass if the Dremel jumped while I was cutting. I then cut a circle the size of the hole I needed (using the old lampshade as a template) and cut it out. I placed it on the painters tape, lined it up with the center of the flat part (which I had marked on the tape earlier), and drew around the edges with a permanent marker.


When the template was removed, it looked like this.


Next, I took it out to the garage where I had created a little work station on the workbench. This included water (in a spray bottle or cup), my Dremel, my bits, a lights, and an old towel. The towel is nice because it both soaks up the old water and keeps the fishbowl from getting scratched up by any small glass bits or the table itself.


And always remember. Safety! There will be bits of flying glass and glass powder, so I absolutely recommend safety glasses.

University of Kentucky College of Fine Arts hoodie and/or degree is not required.

I also had my hair back to keep it away from the Dremel's Spinning Bit of Hair Pulling. In other words, I don't recommend doing this wearing a three piece suit.

Maybe with a bowtie. Bowtie's are cool.

Anyway.

I began by pouring some water over my tape. The water will keep the bit from overheating against the glass, so be sure to frequently re-wet your working area. Then I began by essentially drawing the circle in with my bit.


After this step is done, the rest is actually pretty easy. I just kept repeating the circle. Over and over.

It takes a little pressure, but by no means do you need to get stabby with this project. Remember to keep the surface wet and just stay with it. The bit does most of the work.


Eventually you'll break through to the other side. The bottom of the bowl is going to be thicker than the glass around the sides, so this project is actually a lot easier than it looks. When you break through, you can use the side of your bit to continue cutting through.

  
Once you get most of the way around, you can either continue till it naturally breaks from the vibration of the Dremel, or you can use LIGHT PRESSURE to press on the circle and let it break on your own terms. Once the circular chunk of glass is gone, you can clean up your edges with the side of your Dremel bit.


I would go back and forth making sure that the fitting in the light would fit in the hole. When I was done, I removed the painters tape and used an old sponge (remember, glass bits everywhere) and some dish soap to clean it up.

Here is a side by side with our old shades.


Mmmmm. So good.

I repeated this process exactly for the other bowl. The entire process for one shade takes about 30 or 40 minutes.

While I had originally gotten white pendant bases, I felt that silver would really help these stand out a little better. I had issues removing the bases from the ceiling, so I just painted them while they were up. I have never done a makeshift spray booth before, but it wasn't as intimidating as I thought it would be. I actually just used some printer paper and taped it around the ceiling portion. The "walls" were made with a 99 cent drop cloth from Home Depot. The bases were primed, then painted in the Metallic Silver.


Once they were sprayed, had dried, and were put back together, I was finally able to do some final assembly. This included replacing the bulbs with a couple Edison bulbs to really add interest. We wouldn't have done this before because they cast a much more yellow light, but as an accent, the Edison's are so fun. They are actually dimmable, too, which is nice because we already had a dimmer switch installed.


When they were all together, they really made the space feel magazine-y. It feels very high end, but obviously not at a high price.


Here's the finished product!


Making these glass globes really made me feel like I can tackle so many more projects that might involve glass in the future. What do you think? Would this little guide help you feel more comfortable cutting glass for your own craft needs? I hope so!