

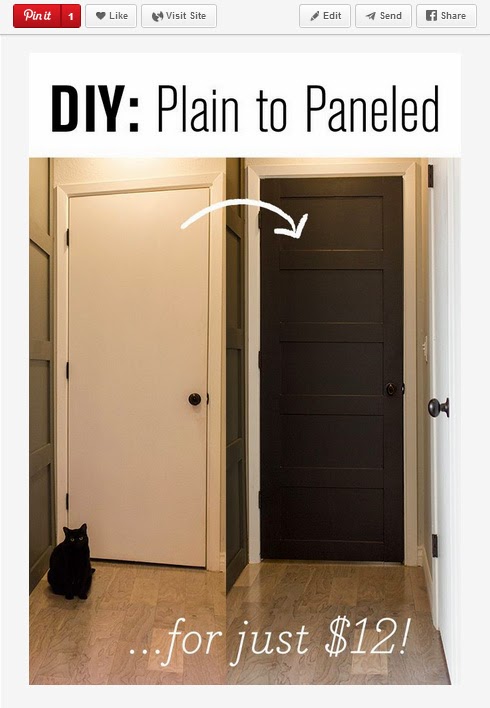
While on Pinterest the other day, I found just what our humble little doors needed. Over on Jenna Sue's blog, she showed how she pumped up her frumpy plain doors with a little trim and paint for $12. I showed Scott and he was just as sold as I was.

We started by grabbing our materials. Most of it we already had, but we needed to buy the wood for the trim. If you are thinking of doing this yourself, I would recommend making sure that you have everything before beginning:
-Air compressor/nail gun with brads or nails
-4ft x 4ft piece of 1/4 in thick plywood (This ran us about $14.95 at Lowes. I think the original blog must have gotten their for $12. Oh well)
-Spackle, sanding sponge, putty knife
-Paint, paint brush, small roller
-2in hole drill bit for the knob
-Saw (We used a miter saw, but you could probably do some of this with a miter box and a hand saw if you don't have many power tools.)
-Wood glue
We purchased our plywood and immediately ran into an issue. It wouldn't fit in the Rogue. Uh Oh.
Scott wandered back inside the store while I stayed in the car. To my surprise and delight, he exited Lowes with a stack of pre-cut 3in. slices of our previously single 4 ft. square board. I would recommend having them cut it in store. This made assembly soooooooooo much easier. Waaaay easier. As in, a lot easier.
Easier.
You get the idea.
Scott took the door off of the hinge and placed it on saw horses. This made measuring and attaching our plywood pieces much easier.

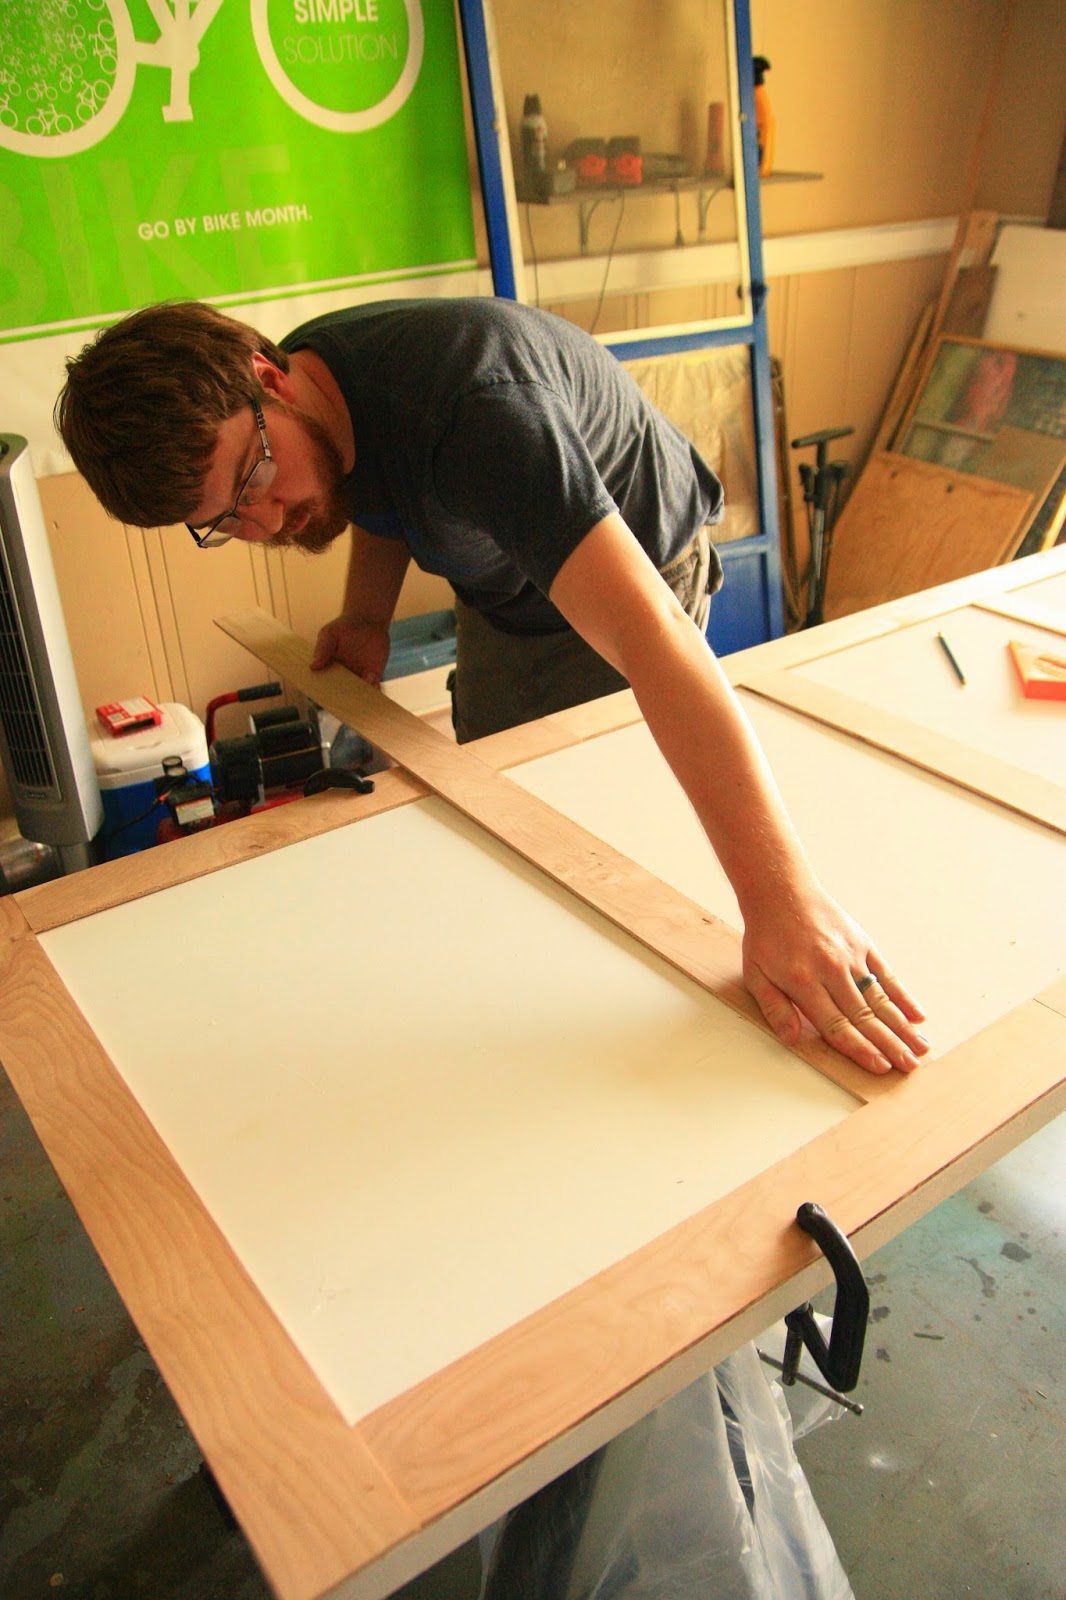
After the door knob had been removed, we began laying out the pieces to get an idea as to how they would fit and how much scrap we would have left over.

-Air compressor/nail gun with brads or nails
-4ft x 4ft piece of 1/4 in thick plywood (This ran us about $14.95 at Lowes. I think the original blog must have gotten their for $12. Oh well)
-Spackle, sanding sponge, putty knife
-Paint, paint brush, small roller
-2in hole drill bit for the knob
-Saw (We used a miter saw, but you could probably do some of this with a miter box and a hand saw if you don't have many power tools.)
-Wood glue
We purchased our plywood and immediately ran into an issue. It wouldn't fit in the Rogue. Uh Oh.
Scott wandered back inside the store while I stayed in the car. To my surprise and delight, he exited Lowes with a stack of pre-cut 3in. slices of our previously single 4 ft. square board. I would recommend having them cut it in store. This made assembly soooooooooo much easier. Waaaay easier. As in, a lot easier.
Easier.
You get the idea.
Scott took the door off of the hinge and placed it on saw horses. This made measuring and attaching our plywood pieces much easier.


Starting at the top of the door, we cut our first piece (I'll go through an exact step-by-step here a little later). We decided to cut the footer and header as the capping pieces and then align the sides to those. This is definitely the way I would recommend doing it.

We then used clamps as we went to hold down the pieces we had previously cut so they wouldn't move. Scott then measured and cut the struts for the middle of the door.

Once again, we laid it out and made sure it all looked correct.


Using some Gorilla Wood Glue, I slowly worked in the same order that the strips had been cut. I placed a line of glue, lined up the piece with the door, then used the nail gun to nail it into place.
Once it was together, we hung it up. Usually you would wait to spackle and paint it outside, but we needed a door on the room. We were doing the Ice Bucket Challenge that night and needed an extra room for people to change out of their cold and wet clothes. (For more on that, check out the bottom of this blog post.)

Once it was together, we hung it up. Usually you would wait to spackle and paint it outside, but we needed a door on the room. We were doing the Ice Bucket Challenge that night and needed an extra room for people to change out of their cold and wet clothes. (For more on that, check out the bottom of this blog post.)

This is when we ran into a problem we didn't really consider. The new door was thicker than the old one.


It didn't close! Thankfully it was closed enough for people to change behind, but we knew that we would need to move the hinges for any future guests that might be staying with us. (For anyone wondering, we started with the guest door because it's the only door you really see at a casual glance down the hall. We are going to finish them all like this over time, though.)
After the hinge had been moved out a little, we were in business.

After the hinge had been moved out a little, we were in business.

As you can see, there is a little bit of paint on there, too. I decided that doing all this work just to paint the doors white again might be a bit of a waste. I chose (of course) a neutral grey/blue called "Sanctuary Blue" in Behr semi-gloss because I liked the look of the space in this Pinterest pin.


And it seemed to go well in the hallway as well as the guest room when the door was open.


After spackling the holes left by the gaps and nails, sanding them all, and wiping away the dust, I gave the door a good coat of the new grey color. I painted the whole front except for around the door knob. Here, I placed a scrap piece of wood (also glued and nailed in place) to help add a nice base for the knob to attach to. Here you can kind of see what I mean.

I used the 2" drill bit to re-drill the hole for the mechanism, then painted over it all to make it look like one piece.


Finished off by a final coat of paint and the door knob.

How about that? Not too shabby (anymore), eh?


So far, so good.


The door knob had a few scratches, so I gave it a quick touch up with the Oil Rubbed Bronze and some poly and let it dry before attaching it again. Check out that hallway now!

Instead of taking the whole door down to do the back side, I just put it together while it was still on the hinges. This wasn't too difficult, but I would recommend taking it down for both sides. Here is the progression for what to cut and attach in what order. I am a very visual person, so if you want to use this as a tutorial, the images might help! (Read in order from top left to right)

Finished off by a final coat of paint and the door knob.


Only 5 more doors to go. For now, at least, our guests will have a much fancier-feeling room. I'll also add that the weight of the wood trim to the door gives it a nice heft. Oh, and I wanted to clarify: The $15 sheet of plywood was enough to do BOTH sides of this 30 in x 79 in door, so you can easily estimate about $15 per door. I was also sure to use some of the scrap for the back side pieced together. Once it was spackled and sanded, though, it made it much less noticeable.


See the three pieces? My pride says you don't!
So what do you think? Is it worth it? I'd say so. And so much cheaper than buying "nice" newer doors. I'm really hoping they help our resale, too.
.jpg)
PS- For anyone wanting to check out our Ice Bucket Challenge video and possibly donate, you can watch it below. We really appreciate any views we can get and awareness is key. We are also participating in a walk at the end of September and donations can be made to Team Anita here. It's a very personal cause to many of our friends and we would like to do all we can to support them and anyone else who has been touched by this disease.
.jpg)
Hello!! We are looking at doing this.. Can you go into a little more detail about moving the hinges? Did you just eye ball it? Did that not make your door stick out/not be flush afterwards? And if you did just move them out a little, did you not get super close to the same holes already there? I would be scared of like accidentally making one huge hole. lol. Would love to know if you finished all your others doors and if you came across any issues!! Thanks. That is the only thing stopping us from trying this!! I don't know how to check comments. Could you email me? bryant.aylab@gmail.com!!
ReplyDeleteThanks,
Ayla
I am also curious about the above question; moving hinges. Could you provide more detail?
ReplyDeleteCurious as to why you wouldn't just pry off the door stop trim piece and move that a 1/4" instead of the hinges?
ReplyDeleteJust found this and the above is my curiosity also! Could you please explain this part?? Only thing stopping me from doing also..
ReplyDeleteThank you!
I was told to move the door stops. You need to make sure you can use the hole and plate without having to adjust that also.
ReplyDelete