Monday, August 18, 2014

Adirondack Adventures

While walking through Beth's neighborhood a couple of months ago, some of the trash that had been put by the side of the road caught my eye. There were two Adirondack chairs, a little worse for wear but still in one piece, by the trashcans in front of one of the houses. I couldn't help myself. We grabbed them and threw them in Beth's truck. She dropped them off the next day and they sat in our garage for a while.


I have finally gotten around to finishing them and I have to say, they fit in nicely with our outdoor space. We first gave them a good once over with David's sander. We figured that because the paint was already chipping off, it would easily strip away, but we were surprised by how tough it was to get a smooth surface.


We did what we could, filling in holes and sanding down really rough areas. Once the tops had been sanded, you could even see that they used to be painted white before they were given a dark green color change.


The seat was also difficult to really get into with the sander because of the scoop. We managed to clean off most of the debris, but we would need a tiny little (yet powerful) sander to really get into the seat itself.


I think we used a sanding block just to finish it, but I'm not specifically sure. There was quite a flurry of sandpaper, sawdust, and paint chips flying around while we worked.


Believe it or not, this is actually where we stopped. It doesn't look completely stripped because it wasn't. We felt that the adhesion of the paint that had remained was good enough that covering it with a paint-and-primer-in-one would do the job.


Before painting anything, we were sure to examine all of the screws that held it together, tightening them where we could. One of the arms needed a little extra support, so Scott screwed a small block of wood underneath to shore it up.


It was finally time to paint. I wanted them to match the two plastic Adirondack chairs that we already had around the fire pit, so I chose a color that felt close to them. I have found that when it comes to spray paint, you can't beat the new Valspar line at Lowes. They have a nice selection of colors and paints for different areas of the house, both inside and out.


I started with two cans thinking that two coats would be enough. I was wrong. One can barely covered one coat.


It's kind of hard to tell in the photo, but it didn't saturate as well as a paint and primer usually do. The wood was so worn that there were distinct guttered streaks that followed the grain. Covering those took 4 cans per chair overall. Here is a better example of the texturing issue I'm referring to.


After the fourth can of spray paint ran dry, though, the coverage was much better. Once they were ready, we moved them out to the fire pit. They fit right in. The colors matched even better than I could have imagined!


The fire pit feel so nice and established now (except for, you know, the actual pit itself. We're hoping to build in a permanent one so it's not so sad).


We have already used them once and it was cozy. We can't wait for Fall so we can sit around the fire and drink pumpkin beer while roasting our marshmallows. The only question is who wants to sit in the plastic and who wants to sit in the wood!

Friday, August 1, 2014

Tub Step

The hot tub is plugged in, filled up, and bubbling away on our back porch. It's been so nice having it lately, because we use our TV cable app and sit outside in the tub, watching TV on my tablet and hanging out. A nice little paradise in the middle of KY.


When we picked it up from the Bachmeyer household, it came with a box of chemicals, a thermometer, and steps. We were excited that it came with steps because stepping that far off the ground to get into an elevated, slick surfaced tub is kind of a no-no.


Unfortunately, the steps had seen better days. When you put your weight on them, the top step would almost cave in. They also had some issues when flipped over.


As you can see, there was just the TINIEST hint of rot. Just a little. I don't want to get technical, but I'd say an iota of rot...

Just kidding. It was everywhere. The rot had pretty much taken over all of the exposed wood on the interior of the steps (where there was no exterior paint) and around the bottom edge. Setting this on a solid surface still felt you were stepping on a marshmallow.


We knew that we would need to replace them, but we didn't quite know how to go about it. I decided to check the Amazon and see what the price of  'plastic hot tub steps' would be. It was a little outrageous. Close to $90 just for two steps. We didn't need a whole staircase!

As always, I said, "Um, no, I can do it cheaper".

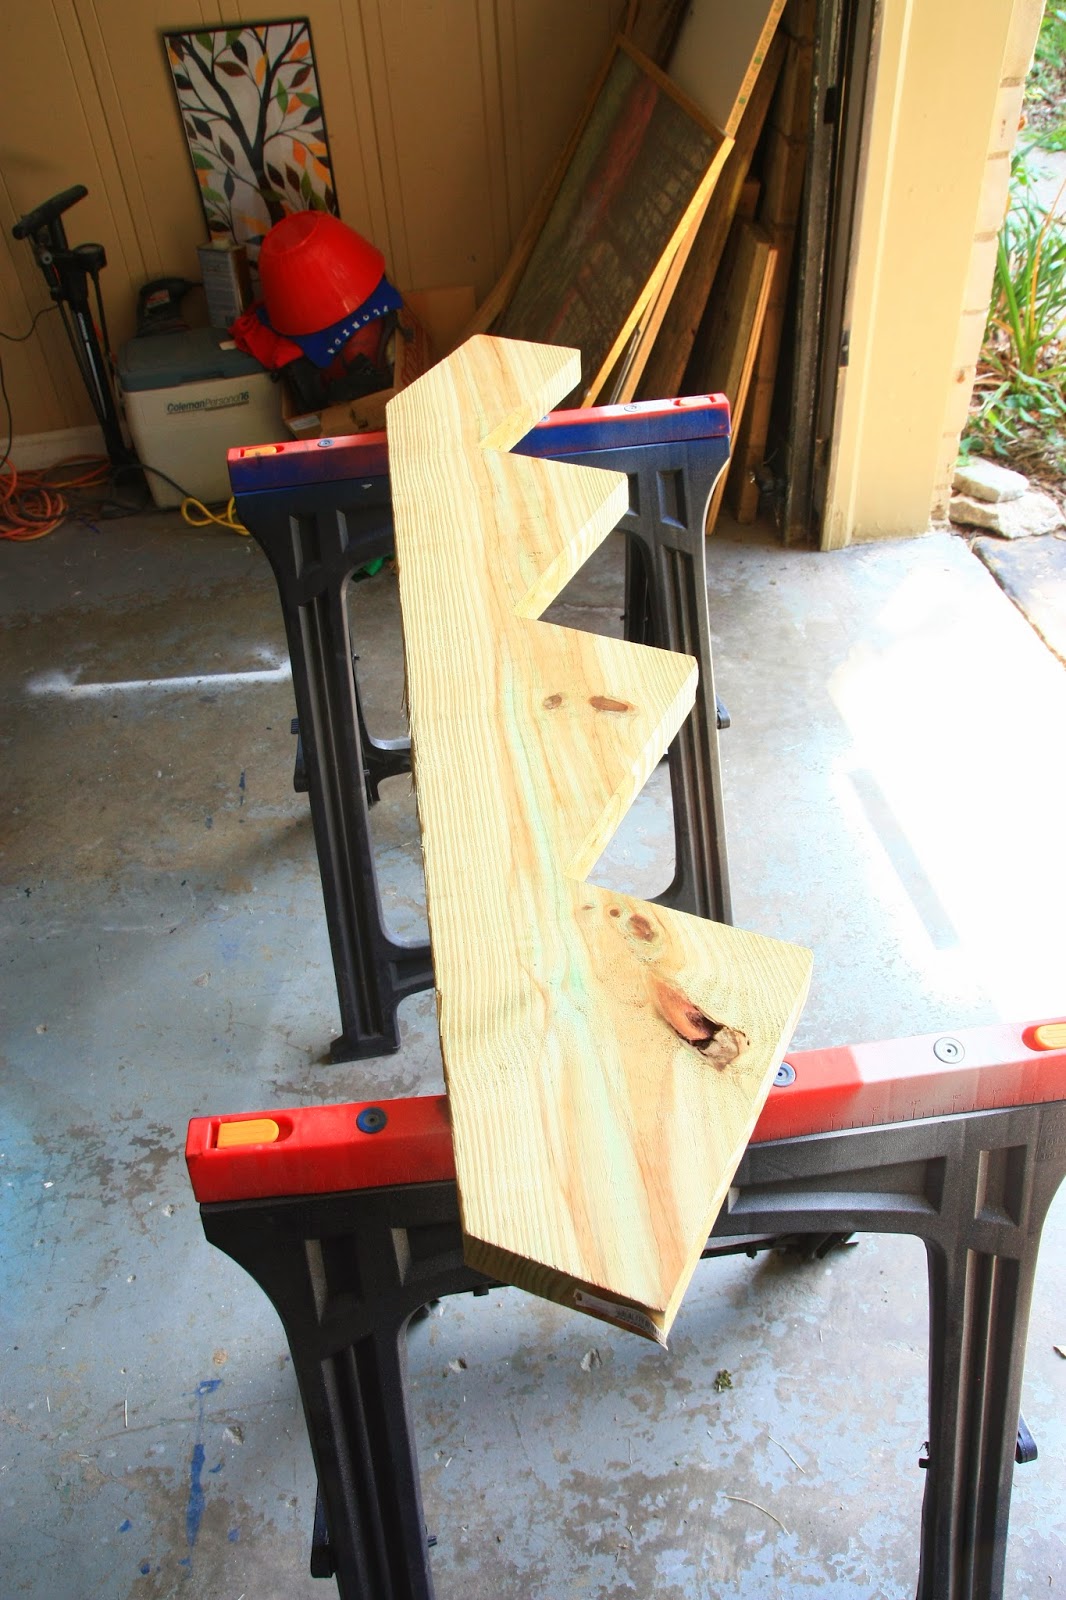
I remembered seeing pre-cut stair supports at Home Depot, so I bought one. It cost $10. (By the way, on this project, I will only spend the astronomical amount of $10.)


I could either make half of a four step ladder that was terribly supported, or I could cut it in half and make two steps. Though tempted by the first option, I decided to go for the more practical approach.

I cut it in half, following the same angle as the nearest step to the center of the overall support. Here is the line I used (drawn with a straight edge). I then cut along the line.


For the steps to sit correctly, they have a different angle at the top and bottom of the support. I simply put one piece on top of the other and marked my next cuts. This would make sure that they were the exact same piece.


I trimmed the one to match the other and I was done. This took about 5 minutes of work.


Then I went to the wood pile and grabbed a couple of pieces of 5.5 in. by 1 in. (If you decide to do this project and you are making it for an outdoor space, please be sure to use pressure treated lumber. All of the lumber you see me using in this post is pressure treated.).

I measured the top of the old steps. It was 27 in. wide at the top, so I cut four pieces of the 1 x 5.5 to 27 in. in length.


Measuring and cutting probably took a good 10 minutes. When I had finished, I was ready to start assembly.

I started with the bottom step. I used 3 inch exterior screws (because that's what we already had). I pre-drilled every screw, making my life a lot easier. This is why two drills are better than one.


The board you see on the right inside portion of the second step is there as a support. I decided to add support to the rear to keep the whole thing from falling when you stepped on it. (Because it's all about the little details). I took an extra board and marked and cut my pieces.

To install them, I clamped them to the stair supports. This way I could drill from the outside in, leaving the exposed tips of the screws away from naked ankles and soft toes.


I repeated the process for the other side.


After having supported the structure, I added the second step. I made sure that the overhang was the same as the bottom step, allowing for the width of the wood and a crack between for drainage (from both tub water and rain).


It's still in need of a good sanding. I would really like to cover the steps with some of the sticky exterior safe tread, but for now, we are just trying it on for size. (Which, size-wise, it's exactly the same height and width as the previous stairs. Just 100% less fally-aparty)


So much nicer than wondering if you're going to be the person who falls through the step! I am going to paint it the same color as the tub, too, so help it blend a bit. Honestly, the whole kaboodle took about 30 minutes to complete, so it was a nice to knock it out before Scott got home.

There is even a bit of an added bonus with our new stairs. See the giant grey rope? That's actually the electrical from the tub. Since there is a little gap between the stair support and the back legs of the stair, it fits much nicer. Huzzah!


Tuesday, July 29, 2014

Oh, Hey, Didn't See you there...

Hey readers!

Don’t worry, I haven’t forgotten about you. I know it’s been a while since I’ve updated, but we’ve been busy. Here is a quick list of posts you have to look forward to in the coming months:

-Helping Mom and Dad spiffy up their new house in Tennessee
-The amazing makeover our friends Kevin and Chris just finished in their new house
-Refinishing two Adirondack chairs we found on the side of the road
-Combining Scott’s desk and mine to declutter the house a bit more
-Spackling and repainting our shabby living room ceiling
-Creating shelves and new industrial curtain rods in the living room
-Hopefully finishing the guest room

What a list, right?! Why haven’t we been working on any of this lately? Well, I actually have enough freelance work (doing photography and design) to keep me too busy during the day to get any real DIY done. I also spent a week with my parents spackling, painting, and cleaning up their new house.  Needless to say, the summer has been jam packed with things to do; unfortunately, a lot of those things aren’t really worth writing about.

There are still (obviously) plenty of things we want to get done, though, so keep checking back and make sure to follow our Facebook page for updates. Till then, enjoy the summer weather and let me know if you’ve had any awesome updates on your own home.

Have a Sciencetastic day!

-The Sturdivants