Showing posts with label bathroom. Show all posts

Thursday, March 5, 2015

Living a Life of Vanity

This is truly one of the most wonderful times of the year. I am referring, of course, to Tax Return Season. The season that allows you to accomplish that thing or things you can't do for the rest of the year. The season of promise, hope, and at least for us, home improvement.

For Scott and I, we used our tax return in many ways. One way has been overdue for a while.

Our master bathroom has always reminded me a bit of a men's gym bathroom. The sink attached directly to the wall with no cabinet. The tile was old and a horrible color blue. The tub was practically stained yellow. It needed some work.

Avid readers of the blog will recall that I have already painted the tile and walls in there. It was a nice fix for a while, but unfortunately, it did not last. Using the sample pots of paint meant that they were matte finished. When we took showers, the paint would literally drip from the walls, leaving marks and really gross residue all over our tiny bathroom. Besides, I liked the color, but I was never in love with it. It was better than what was there, but it still wasn't at the top of its game.


Let's just say it still needed tweaking.

When we found out what our tax return looked like, we were able to say, "Okay, it's vanity time". Nothing could have made me happier than the day I realized that this bathroom had a future. To prep it, though, I wanted to get rid of the green. I was sitting in the living room the other day and I thought, "I bet the blue paint from behind the TV (of which I have half a gallon left) would look great in there". The dark color would be a nice contrast against the white tiles in such a light space plus, it was a gloss finish. One paintbrush purchase later and I was on my first step to a new room.


I even took some time out to fix our switch box. It had only ever been secured on one side, so I put a screw through the loose side. This meant that every time I unplugged something, the whole outlet wouldn't come out of the wall anymore.

It's the little things.


At this point, I had been shopping online for a vanity that fit our needs. We were aiming for under $200 with a lot of storage space, a white top, and a small footprint. I found this Glacier Bay vanity on Home Depots's website and I knew that it was the one.

Unfortunately, a couple of days later, it wasn't on the site anymore. My friend Laurie and I rushed over to the Depot and found that there was only one left. In Lexington. And it was the floor model. I was so happy they had any left, I went for it. I didn't see anything else I liked and to be frank, anything would be better than this.


Scott took little time in removing the old sink. It was attached to the wall through the tile with a large iron bracket, so once it was unhooked from the water and drainage pipes, it just lifted off the wall. We then took the faucet and drain out to reuse them on the new vanity. They were in perfect condition, so there was no use in spending extra money.


It's worth noting that during this bit of disassembly/reassembly, we had an audience watching from our bedroom.

Left to right: Scooter and Loki (who we were dogsitting) and Sam (Leela was in another room)

We brought in the new vanity and set it in place, making sure that it allowed access to all the water lines. We ended up having to purchase longer water supply lines because it is taller than the old sink. Scott also found a drain extender that looks like a bendy straw, allowing it to maneuver slightly to accommodate the space in the cabinet.

Once it was installed, we couldn't believe what an impact it made.


It has a toilet paper holder! There has never been a toilet paper holder in our bathroom before! And it's the correct height, so you don't feel like you're straining your back to wash your hands or brush your teeth. The couple of inches of counter space that surround the sink have acres of potential usable space compared to zero counter space with the old sink. Best of all is the cool shape of the sink entry and the awesome added storage of a slide out drawer at the top.


The whole room was really coming together, but there was something missing. I have been wanting to bring more plants into my home, but finding places for them where they will receive enough sun has been difficult. It occurred to be that a hanging plant in the bathroom would be a great addition to the space as well as a nice start to my indoor plant collection. Mom and I purchased a small $5 plant at Lowes which I then placed in a $5 ceramic planter I found at TJ Max. I plugged the hole in the bottom using a rubber wine cork and some caulking (at my Dad's suggestion). After purchasing some hemp twine, I followed this tutorial to create the hanger.

When Scott got home, he anchored and assembled the hook in the ceiling. Then I just planted the plant and hung it up. I love how it makes the room feel.


The whole room together feels so nice that I'm almost afraid to use it. I feel like someone is going to knock on the door while I'm taking a shower and tell me to get out of their bathroom. It just feels unreal how, in under a week, it has gone from feeling like a men's gymnasium locker room to an honest to goodness residential bath.


We also have more improvements that have taken place in the last week, but I'm saving those for another post. Make sure you like us on Facebook so you know when the next post is! It'll be a real SPLASH!

Thursday, October 23, 2014

Cheapy and Creepy

Halloween is probably our favorite holiday, so we like to make sure that the house feels just a little creepy to get everyone in the mood. We didn't want to spend a lot this year, though, so here are some of my secrets to a wallet-friendly spooktacular space.

There are a couple of small details around the house that I love. We don't have a mantel, so under the TV acts as a nice decorating platform.


Black fabric draped over stacks of books or blocks gives a nice 'uneven ground' to start with. I then layered it with white spiderwebs to give it a spooky feel. Add props to give it dimension and one more thin layer of spider webbing and you're done! Webbing can be reused year to year if it's stored in a ziplock bag, so we haven't purchased webbing in a couple of years. The props came from the dollar store or knick knacks that were 90% off at Target after last year's Halloween. Keep interesting (and non interesting such as salsa, sauces, etc.) jars and clean them out really well. There are printable fun tags online that you can tape or glue to them. You can even skip the labels and just add water and a little food coloring to add a creepy mad scientist effect.


Our french doors needed a little something more than being strung up with spider webs (like last year), so I decided to take a hint from The Walking Dead and make them look really spooky. I saved up cardboard for a month or so and cut it so that it looked like boards. I then just hot glued them together in layers until it created a good canvas for my signs. Lastly, I sloppily spray painted the words and allowed them to dry in the garage.


Remembering that we had left over wreath hangers around, we just used those to hang them on the door. Depending on if your doors are opened or closed most of the time will depend on what door gets what sign, but when ours are closed they look like this. (They do tend to stay open more often then not).


In the old dining area (which has been dubbed by a friend of ours as 'The Salon'), we just replaced our regular pictures with some smaller haunted pictures that were at Target for $1 each. They're kind of small so I'd like to replace them at some point, but for now, they do the job.


The guest bathroom is always fun. I reused the 'bloody' shower curtain from last year (made with a dollar store shower curtain, some red craft paint, and my hands) and the fake dead hand that I found at Walmart for $2 probably 5 years ago. If you want to make your bathroom really feel like it's from Psycho, unscrew all but one bulb just enough so that they don't glow. It makes it so guests can still see, but it gives it an eerie effect, too.


The most fun we had this year was in the front of the house. I had seen something on Pinterest about silhouettes and decided that the garage could use a little zombie love. I took some of my leftover cardboard and used hot glue to make four pieces the size of our garage windows. Then, I traced my left hand repeatedly with sharpie in different gruesome positions. Once I had a configuration I liked, we cut them out of the cardboard with an X-acto knife.


Then they were painted with some black spray paint we happened to have in the garage.


I then just used some duct tape to attach them to the door. I also placed some wax paper behind each one so that the green-light-bulbed work lamp we hung from the garage door opener would be diffused a little.


The results were pretty amazing from the outside.


It looked great, especially with our larger window harboring a grim reaper large window cling ($4, after Halloween special at Target, but could be made like the hands out of cardboard) and a couple of foam tombstones (dollar store). We just replaced the regular light bulb with a green one in a stand up lamp in our dining room to match both window colors.


Together, they really set a creepy mood for anyone approaching the house.


Later on, we were able to turn on a jack-o-lantern in the bottom left corner of the large window.


On the outside, though, it adds just a hint of a haunting.


We really love the way everything turned out, and nothing says Halloween more than approaching a house that looks either haunted or full of Halloween fanatics!


We hope this inspires you to really spook up your own haunt this October! Do you have any other great tips for awesome Halloween decor on a budget? Let us know in the comments!

Thursday, February 13, 2014

Bliiiinded by the Light

Don't act like this isn't the first thing that came into your mind.


Manfred Mann - Blinded by the Light


So earlier I promised to walk you through my curtain creating for the master bathroom which I had almost finished. We begin with the window.


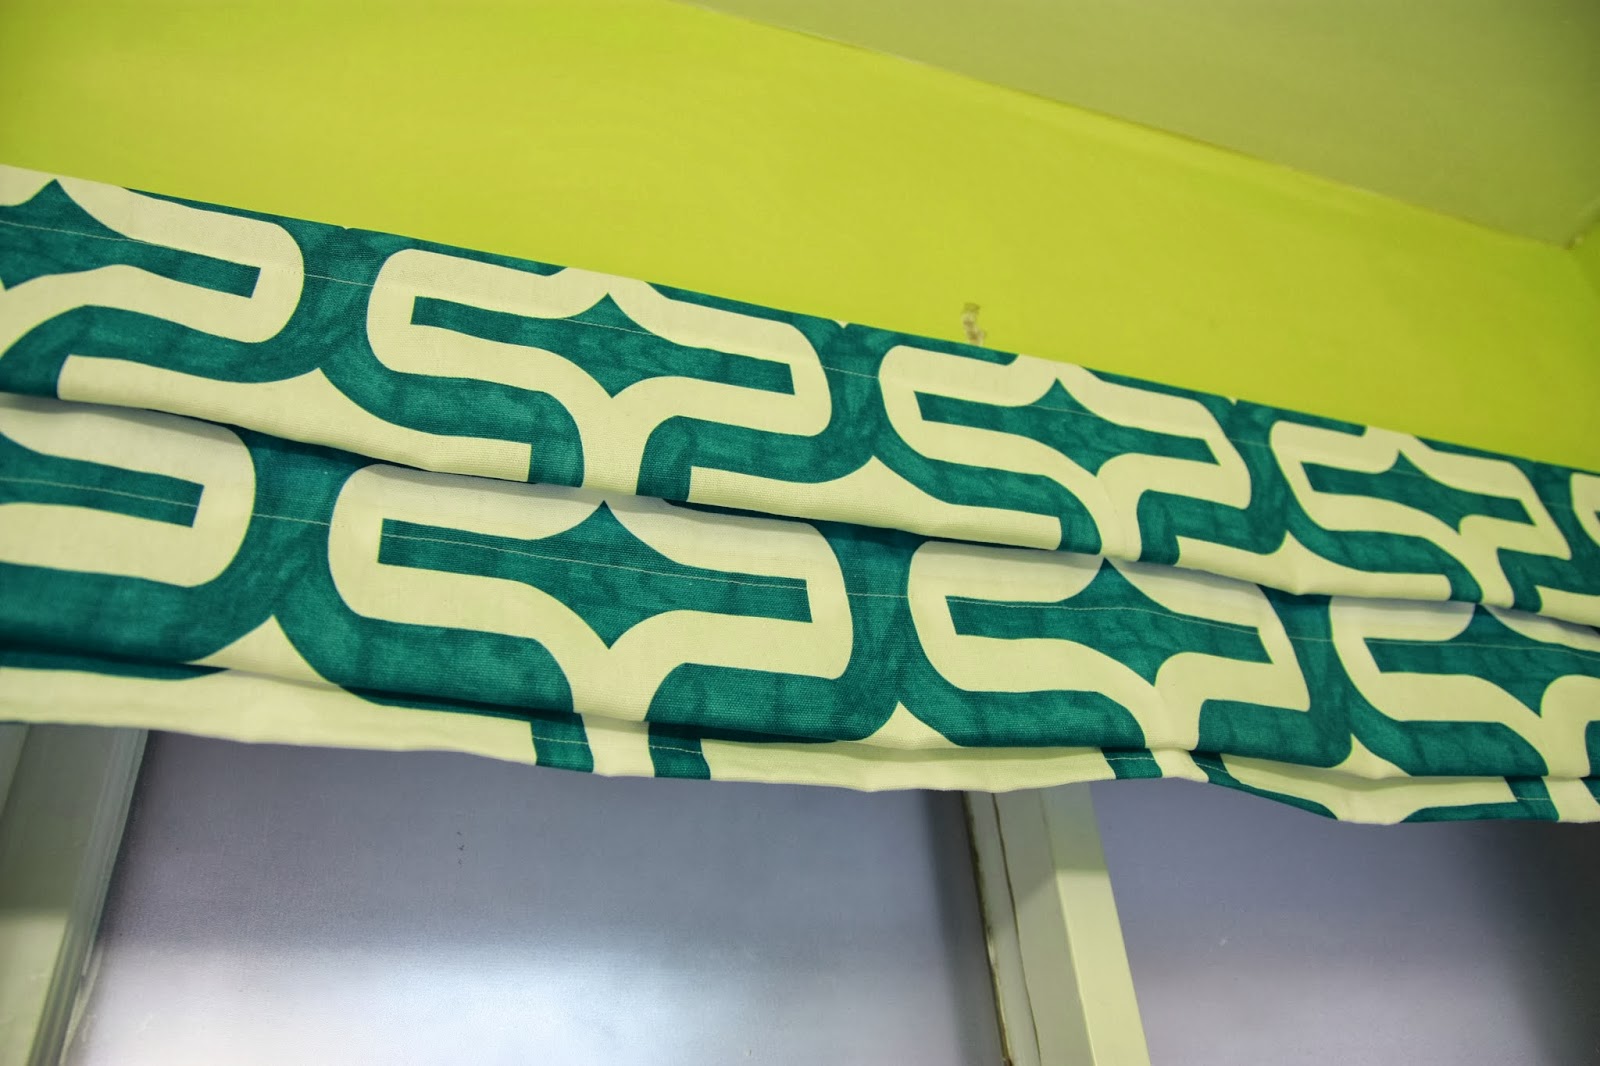
I ended up going to Hobby Lobby (Hobb Lobb) and picking up 3/4 yrd. of Duck Cloth, which I thought would do really well in the moist shower environment. I picked out a really nice bold pattern because there isn't a lot of space for art, so I knew I could take some liberties. My fabric, with my Hobb Lobb coupon from the phone app, ended up costing $4. If you add that to what I have already spent on paint for this room, that comes out to a nice $8. That's right, less than $10 for a quick make over!

I already had scrap wood that I cut to size to hold the top of the curtain in place. I grabbed my sewing machine, drill, and staple gun and I was ready for faux!


I made sure that the top of my fabric was even by cutting along the line that the printed pattern gave. Then I lined up the scrap wood with the top to see how much space I was being given for seams.


I made it so that I could fold it over the edges of the wood to cover it, but only realized later that it was going to be stapled from the top anyway so that didn't matter. Oh well, no big deal.


I double folded the fabric and pinned it for the seams. Then, I just ran it through the sewing machine. Pretty easy so far.


I then laid out the fabric on the bed (I don't have a sewing table), and started playing with the length of the folds. I ended up with this, which I then pinned in place.


I gave the corners of each fold a couple of stitches to hold them in place. I figured that the tension from being stapled would hold up the folds. Spoiler alert, that was a minor mistake.


I made sure that the wood piece was still going to line up.


Then I headed into the bathroom. I predrilled and screwed three screws to secure the wood to the top of the window. I may have gotten a little close with the drill. Thank goodness for extra paint!

Oops.

Then I lined up the curtain and stapled it to the scrap wood. That's when the disappointment happened.

For some reason, the walls look REALLY GREEN in this pictures, but I think it's because it was a cloudy day outside. It's a little softer than eye-burning lime.
In REAL roman shades, there are stiffeners, like dowels, that hold each fold up. Essentially my blind had no structural integrity, so it collapsed. I ended up removing the staples and taking it back down. I ran stitching lengthwise down each fold to secure it and then was able to staple it back up.


It looked much better. Once again, this was a process of trial and error. My Mom made Scott and I curtains for our oddly wide and short bedroom windows (which I will feature when I someday get a coat of paint on those walls!), and made it look easy, so making the fake version in half the size gives me a lot of respect. Good job, Mom!

I have to say, the fake curtain really makes it feel like a real room. The finished product made me really happy I took the time to take it down, fixed it, and try again rather than giving up.


Yay for quick makeovers!