Tuesday, April 29, 2014

A Whole New Wooooooorld

We are feeling like we are a little more connected with the outside world as of a few weeks ago. When we bought the house, the large window in the now-dining room didn't open. It was apparently painted shut and the last owner of the home decided that she didn't need them to open, so she never really fixed it. Amusingly enough, she did purchase new locks for the windows that wouldn't open.

Anywho, as it happens, I was bored in early May and decided to try to get them to open. It actually ended up being a super simple technique. I just used a metal spackle putty knife and wedged it between the windows.


Then I just lightly tapped it with a hammer so that I could see it in the window below.


Continuing this all the way around the bottom portion of the window and the frame loosened it enough to push it open (with a little effort). It only took about 15 minutes of hammering and pulling on the windows to get both sides to open, though. Not bad!


That's when we realized that apparently there is no good way to get behind the window and paint the little bit of exposed wood at the bottom of the top window pane.


Oh well. Hopefully one day the whole window will be replaced anyway (especially since we don't have any window screens for the now open windows.).

Scott actually did a little preventative maintenance once we had them open. He took some White Lithium Grease and coated the window tracks with it.


This is a better lubricant than WD-40 (which was actually originally created as a cleanser, not a grease. We recommended people use it to clean up their bicycles all the time when I was working in a bike shop.), so it will last longer and work better over time. He just used the little straw and got right into the tracks with it, careful not to over coat it.


After he had gotten both tracks for a window, he would open and close the window to work the lithium grease into the enclosed part of the window track. We wiped away excess that was on the molding when he had finished.


We were so excited to have working windows that we put this picture up on Instagram!


Huzzah! Spring! Do you have any older windows that won't open? Give this a try and let us know how it goes!

Monday, April 28, 2014

A Bench Ruling

This will be a quick post (because the project is nowhere near complete), but I thought it would be fun to let you know that some demo has been happening in the Sturdivant household! Actually, not IN the household...more like, in the garage of the household.

Anywho, I figured I would just leave this quick time lapse video I made here to wet your appetite for some future pegboard hangin', cabinet mountin', bench perfectin' action. Enjoy!


That's right! I finally took half of those shelves out. I found out a couple of things in the process, too. First is that they were apparently made from old scrap pieces of equipment boxes for some electrical company, so that's kind of cool. The second is that you have to ALWAYS wear your gloves when doing demo. I took them off at one point (don't worry, I was wearing close toed shoes and safety glasses), but forgot to put them back on. Oops. Just a little scratched up on my hand. I won't post the picture here, but it's kind of gross.

This month is going to be super busy for us, but I'll try to keep you updated on projects as we have time to complete them.

Have a good week!

Tuesday, April 22, 2014

Spring Some Knowledge On Us

(Hey guys, get ready for larger images on the blog because THAT'S WHAT'S HAPPENIN', HOT STUFF! We've made our pictures bigger so you can check out the images on our posts that much easier. Enjoy our 'in your face, interface'!)

I seem to be the only one of my friends and family that isn't a natural green thumb. I think I'll catch on after a while because I have a real yard and real landscaping to take care of, but I just don't have the ability to walk up to half of the plants in a garden center and identify them properly without looking for a tag.

With this being said, this post is going to be super interactive. I am asking you, the readers, to play a little game with me. It's called, "Identify My Yard". I am going to show you around our yard and I will put a letter next to each different plant. Please place any identifiers you can with the correct letter in the comments section. There aren't any prizes (except for some super bragging rights), but I would really appreciate the help. Ya know, from someone who wants a nice yard to a plethora of people with nice yards already.

To start, in the backyard, we have this horrible monstrosity of a flower bed against the house. Thankfully, we have a really pretty tree in it that is already well established. Here is the flower bed:


Here is Tree (A) as of last week:


And as of Easter Sunday:


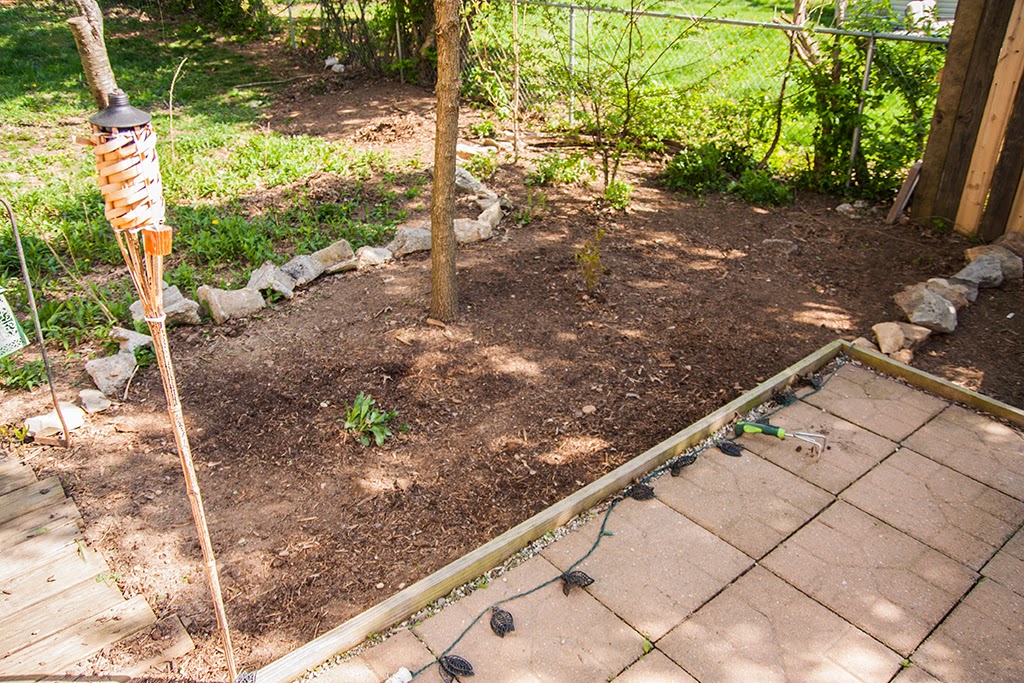
Across the walkway from this bed is the flowerbed under a tree and next to our porch in the backyard. Originally it was shaped like this:


Which I thought was way too big. I brought the rock barrier in a little and made it a bit more of an organic line. Which looked like this:


And after 3 hours of clean up, looked like this:


But more importantly, what kind of tree is Tree (B)?


We have a third tree in the back (Tree C) that is beautiful. We have been using it as our bird station for the month, but we hope to move that over to the less used side of the house. Till then, it looks like this:


And has buds on it that look like this:


Thankfully the bottom is surrounded by a flower I AM sort of familiar with. Daffodils!


We have a large dirt pile in the back of the yard that also has a bunch of them. Apparently when you move dirt, the bulbs/roots will travel with it. It cracks us up every time we see it.


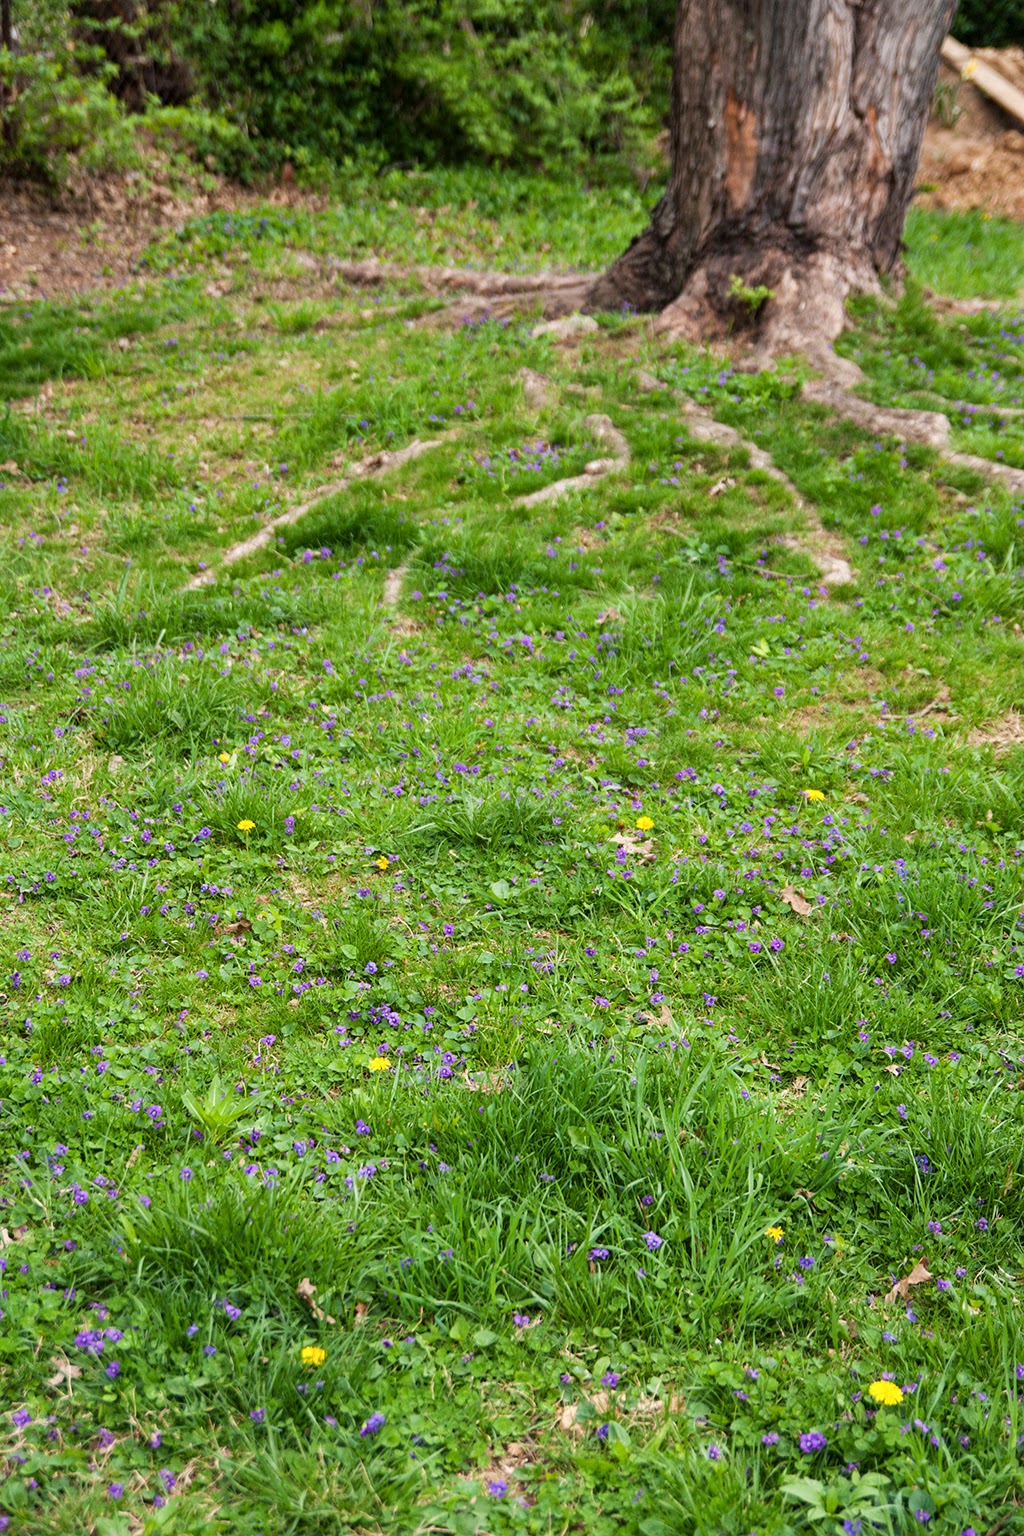
What really puzzles us are the small purple Flowers (D) that seem to be everywhere in the back lawn.


They are pretty small, but very cute.


The front yard is a whole different story. We can start with this odd Plant (E) beside the garage door.


It matches the rest of the front yard, which is a bit of a disaster (except for the entry garden):


A lot of the stuff growing here is hard to identify and I don't even know how I would go about labeling this. There is one Bush (E) that has pods like this, though.


And a cool Twisty Tree (F)


...accompanied by a large covering of this (which I believe to be creeping flox?)


But there are a more daffodils, so that helps:


And the entry garden next to the driveway is showing some color:


...but it is still the only garden I would consider "together".

Right up against the house, it gets worse and even more random. There are these weird Bushes (G)


And these weird Bushes (H)


Which we haven't really touched since moving in. I would like to replant the whole area, but for now, knowing is half the battle.


We spent a solid 5 hours of clean up a couple weekends ago. We raked the rest of the leaves that were left from the fall season and bagged a lot of old mulch and dead acorns that littered the backyard. When we were finished, our trash pile looked like this.


We are going to slowly work on our landscaping, but for now we would just be happy to know what everything is. Please leave your guesses and comments in the comments section. If not for us, please leave them for the Leela. She would like to know what she should lay on in the coming warming months.


#Thatface

Monday, April 21, 2014

Lamp it up, Fuzzball!

First off, check this action out


Over 10,000 page views! Huzzah! Thanks for being awesome readers (and only a couple people I bribe).

Today's tutorial is short but really cool to make and you can knock out a bunch this week and enjoy them this weekend. Check it out.


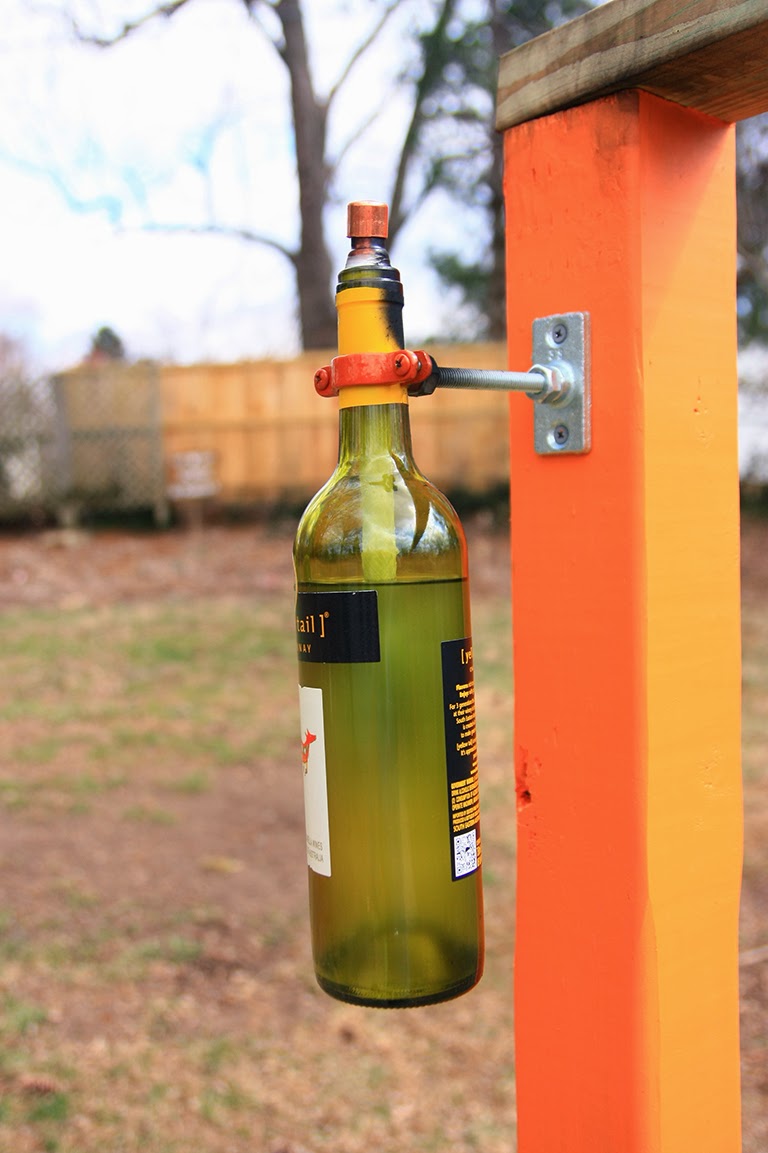
Cool wine bottle tiki torches! We originally found the tutorial on Design Sponge (which if you have never been to, you should totally check it out). The tutorial is really great, so I recommend using it because it is slightly more detailed then ours, but if you want the gist of what it tells you to do, here it is.

This is the mount for the wine bottle.


And these are the pieces that created it.


(Below is a much easier to read and copy/paste list of items you're looking for! The pictures were just fun)

For the bottle itself, these are the parts you'll need.


Your quick copy/paste purchase list looks a little something like this. It includes the break down on cost for us to make four at once with prices from Home Depot (just because that's the hardware store that's closest to us). Cost doesn't include your choice in fine wine:

1. Empty Wine Bottle (4 needed: $ one liver)

2. Teflon Tape 1/2” =$0 (already had)
3. Copper Top Plate Connector (threaded for 3/8”-16 thread rod)= $1.94 each
4. 1” Split Ring Hanger (threaded for 3/8”-16 thread rod)= $1.68
5. 1/2” x 3/8” Copper Coupling=$1.50 each
6. 1/2” Copper Cap=$0.68 each
7. Two Hex Nuts (threaded for 3/8”-16 thread rod)= $2.70 for 25 pc.
8. Two #10 x 1” Zinc Plated Wood Screws (if your mounting it to wood)= $0 (already had)
9. 3/8”-16 Zinc Plated Threaded Rod (I bought a 3’ rod and cut it down to 8, 4-1/2” with a dremel or cut off tool.)= $1.97 per rod
10. Tiki Replacement Wick=  $2.96 for 2
11. Torch Fuel (For safety reasons, only use fuel made specifically for outdoor torches. i.e. Tiki brand)=$0 (already had. Ended up buying more, though. A larger container is about $10-$13. This cost is also not included in the final cost)
=$33.79 for four

Once we had purchased all of our pieces, we came home and put them together. This took all of about 3 minutes.


For the bottles, make sure they are dry and clean on the inside. Take the copper coupling and wrap the fat side with enough tephlon tape so it doesn't fall into the bottle neck. Then just fill the bottle with your tiki torch oil and place the wick inside the coupling, placing the coupling and wick on/in the bottle last.

I would recommend mounting the mount itself first to wherever you are going to put these. Then take the wick and coupling out of the bottle and mount the bottle to the split ring hanger, THEN put the coupling and wick back in the bottle. This will keep things from getting shifted around or the wick from falling into the wine bottle.

Let the wick soak up some of the tiki fuel and then light. Make sure to not have any on your hands because I am not responsible for the loss of fingerprints or, ya know, hands...

They are really cool and they are great to have around our fire pit because they help light up the area just a little more. The tiki torch fuel also has citronella in it, so it keeps the bugs at bay while we roast our marshmallows. You can see the lamps we made in the picture I put up last week, mounted to the hammock supports.


Yeah, there is one missing here. Oops!

Hopefully this tutorial combined with the other much better one will help you knock these out. Scott wants to replace the wine bottles with bourbon bottles because he thinks it's classier. I'm not completely sure about that, but they do lend themselves to many different types of bottles, so you can switch them out anytime you want.

One more time.


Hopefully you'll be able to make some of these and enjoy them this week. We hope everyone had a fun Easter! He has Risen, yo!

Monday, April 14, 2014

The Hammock Hookup (PT.1)

First things first. We are not done with this project yet by any means, but since it's taking a while, I figured I would just write out the whole thing in parts. A couple people who have been able to see this have asked that I do at least a small write up of it so far, so I am breaking it up into three posts.

Welcome to post #1!

We have known that we wanted to install some sort of hammock hangers in the backyard for a while. We both have light weight camping hammocks that we love to use, but there are no trees close enough to actually hook them up. We decided that some supports that could triple as hammock hooks, torch holders, and architectural interest would be a nice additional surround for the fire pit. Since we each had a hammock and many of our friends had their own, for both entertaining and symmetry, having three places to hook up would be best. That means two bolts for each of three hammocks to hook into.

We grabbed four pressure treated 4x4s, a post hole digger, and one of our hammocks, and started measuring.


All of the tutorials we read said to measure your hammock and then add a foot onto the length. We laid out the hammock and added our foot, marking it with some green spray paint.


For us, these measurements were 132" from the center of one post to the center of another.


Then we started to dig. We were only really able to work on one at a time because we only had one post hole digger. This process was made even slower by the fact that our yard is full of rocks. Not small, gravelly rocks, but large ones that have to be broken up to be moved. Scott ended up having to use a spud bar (ha!) that he borrowed from our friend David to make any headway.


It's essentially a giant iron bar that you ram into the ground and it exhausts you. I think it's supposed to be an efficient way of breaking up rock so you can move it, but it still takes a ton of work to use. It did allow us to finish two holes in one day, though, so I would still totally recommend using one if you have any rock issues like this in your own yard.

As usual, the girls were of no help. Especially Sam who taunted her laziness at every turn.


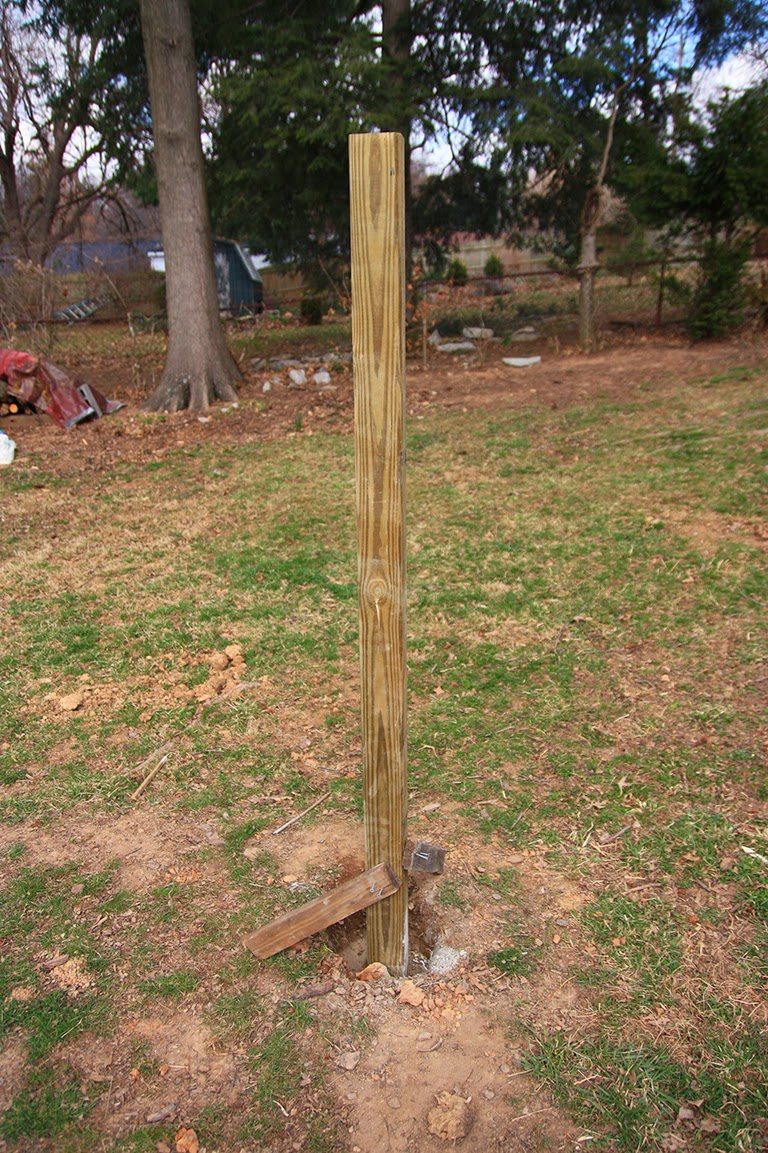
When we believed that the holes were deep enough, we took some dry cement and added it to the bottom of a post we had already set into the hole. Scott added temporary supports to the bottom of the post while I leveled each side so that it wouldn't move while setting. We then added the appropriate gallon of water to the hole and worked on the other post.

Since we wanted all of our posts to be the same height, but our yard slopes, we had to use the string method to make sure that everything was lined up. This meant that he dry set the other post in the hole he had dug and held a string at the top. I held the other end of the string at the top of the post we had just set in cement and then we pulled just tight enough that the string was taught. We set our level against the string to get an idea as to how much dirt we needed to add or take out of the hole for the new post and worked from there.


We managed to get the other support level and set in cement before we went in for the day. That was on a Saturday, so we had planned on working on it on Sunday, but God had different plans. Kentucky weather is a little weird. For instance, our last two days have been in the 70s, sunny, and perfect. It's supposed to snow tomorrow. Same thing happened that Sunday.

Sunday mid day.


Less than 3 hours later.


We weren't able to work on it again until the next Saturday. Our first order of business was to repeat what we had already done so we could get the other posts in the ground. Thankfully this didn't take very long. We just made sure they were level and added our supports.


Then put in our dry cement and added our water.


After the cement had set for all four posts, we were able to add hardware to attach our hammocks to. We ended up using large stainless steel screw eye bolts that were long enough to feed all the way through the 4x4s. I just measured 42 inches from the ground (a number which we got from setting up our hammock awkwardly in the corner of the yard and measuring the height of the clasps) and drilled through the supports. Then it was just a matter of screwing in the bolt all the way and securing it with a large washer and bolt.


We hooked up our first hammock and....almost disaster! The supports by themselves weren't going to be able to hold a human's body weight over time, especially after being weathered, so we had to change our strategy slightly. We grabbed some pressure treated 2x4s that we used as cross support beams and tried the hammock again. Success! There is even a plan to make it look like a mini pergola so that it doesn't stand out so much (that'll probably be the third post in this series).

I also tried out some paint colors to brighten up the whole facade, but quickly decided that wasn't the way to go (so ignore any bright orange you might see!). We were able to assemble and mount our cool new DIY torches we have been wanting to use for a couple of years, too, though, so we accomplished quite a bit. (How to make some DIY tiki torches is going to be post #2 in this series. I'm hoping to have that one up by this week!)

So far, our backyard is looking like this.

(Keep in mind that it's still spring. Our yard will look more lush in a month or so!)
Which is a far cry from where we started.


Now we just need to:

-Strip off the orange paint (ugh)
-Finish the pergola support beams
-Stain entire structure dark
-Move the dirt in the flowerbed to the dirt pile
-Reseed the entire backyard
-Redo our temp walkway into a permanent one with stone
-Landscape and mulch
-Start our garden against the back fence
-Create a bird feeder area on the other side of the house

It's quite a list, and not all things that we want to accomplish this year necessarily, but at least it's a place to start. For right now, we have really enjoyed the use we have gotten out of our new outdoor entertaining area. We had some friends over a couple of weeks ago that really helped us break it in! We have discovered it's also the place to be when UK wins basketball games and you want to listen to the police scanner all night!


Do you have any plans for your backyard this year? Sam wants to know, so leave it in the comments and we'll read her your answers! (She can totally probably read, she is just lazy)